 |
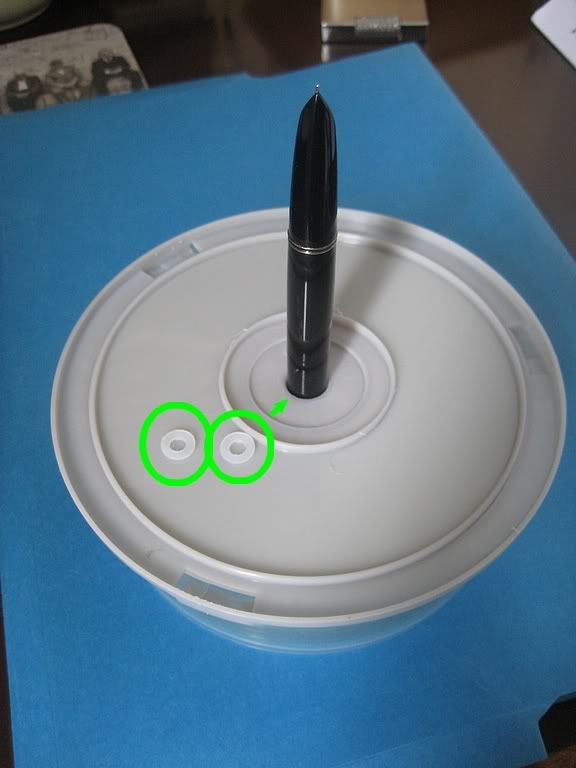
| The 616, ready for blind cap cutting. Circled - spacer washers. |
As before, the barrel was seated in the hollow spindle of an upturned cake of DVD blanks. This time round, though, the cavity was first filled with plastic washers left over from the button filler project. Doing this raised the level of the cavity, so the blind cap was cut higher up the barrel.
How high up? The blind cap had to be long enough to cover the vacumatic plunger stem, and this in turn was governed by the length of the compression spring when at rest. Translation - I guestimated! It came out at about 3.3 centimetres long. This left a decent barrel length to accommodate both the filler and a decent sized ink capacity.
A wrap of masking tape helped protect the barrel from any clumsiness, and I started sawing away. This step is a bit of a chore, and something I chose to spread out over a few days. If you can think up a better way to get a straight cut across a cigar shaped plastic barrel, please drop a line in the comments box below this post.
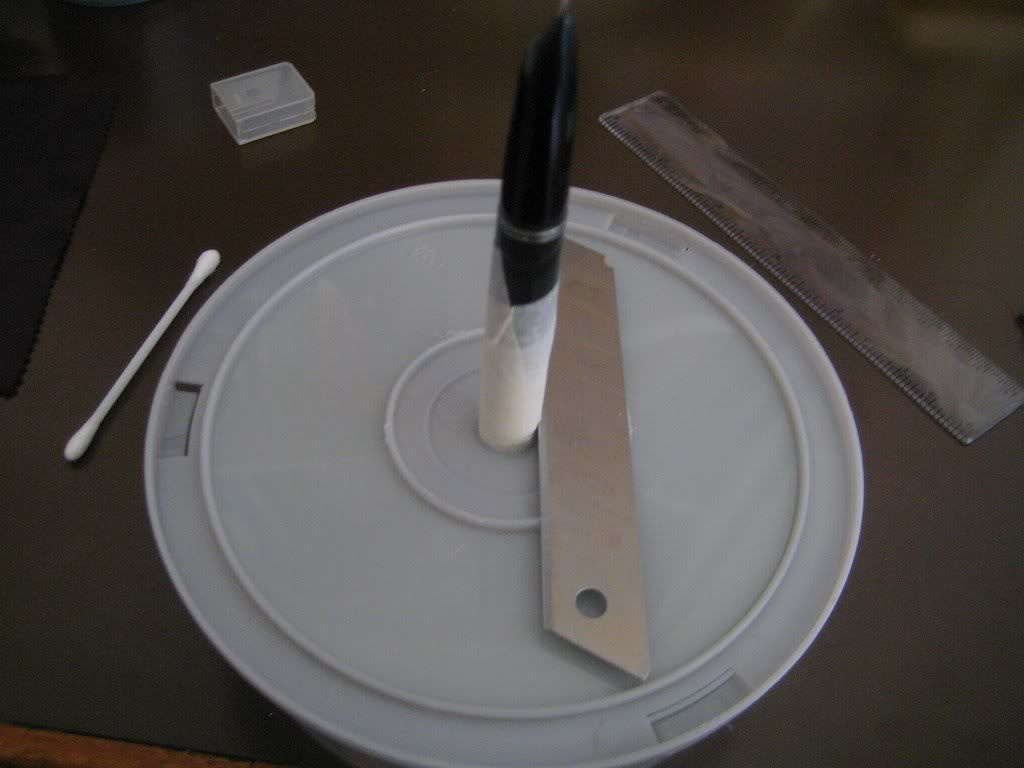 | |||
| Sawing the barrel apart! |
 |
| The revised blind cap, with a Woods valve cap on the right. |
The Woods valve cap is made of soft plastic, and the top can be easily guillotined with a stanley blade. The plunger stem is quite narrow, so the valve cap doesn't require any further hollowing out after the top has been opened to function properly.
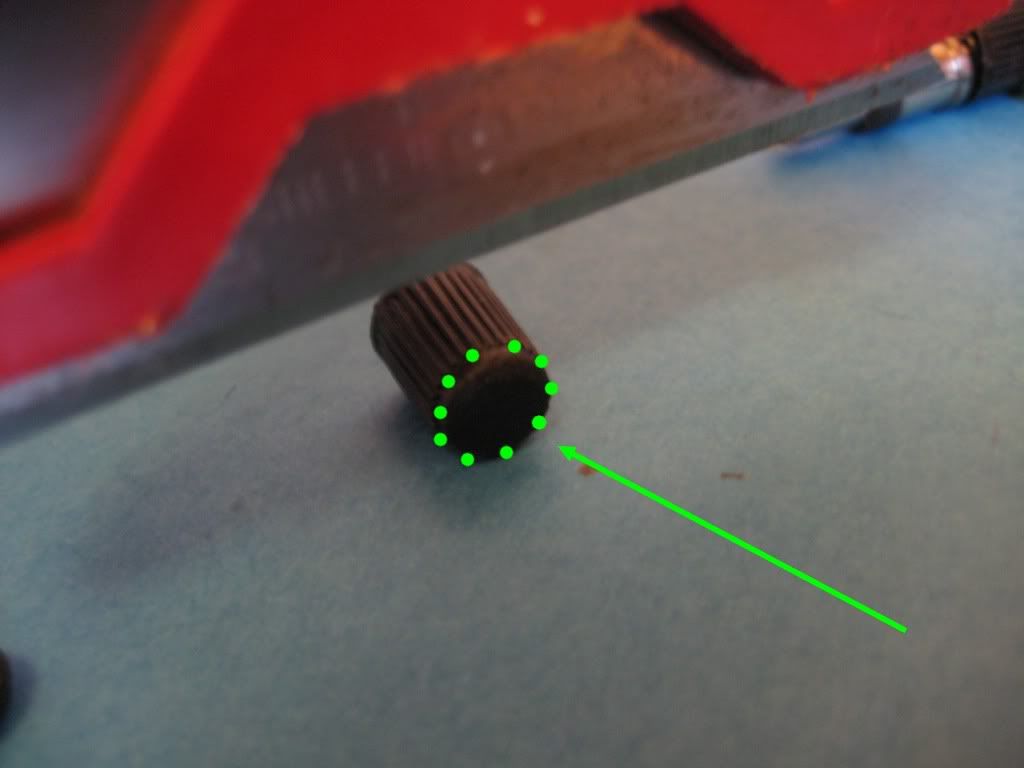 |
| The top of the Woods valve cap, about to face the executioner. |
 |
| The Woods valve cap screwed onto the pen, the vacumatic plunger rod safely clearing through the top. |
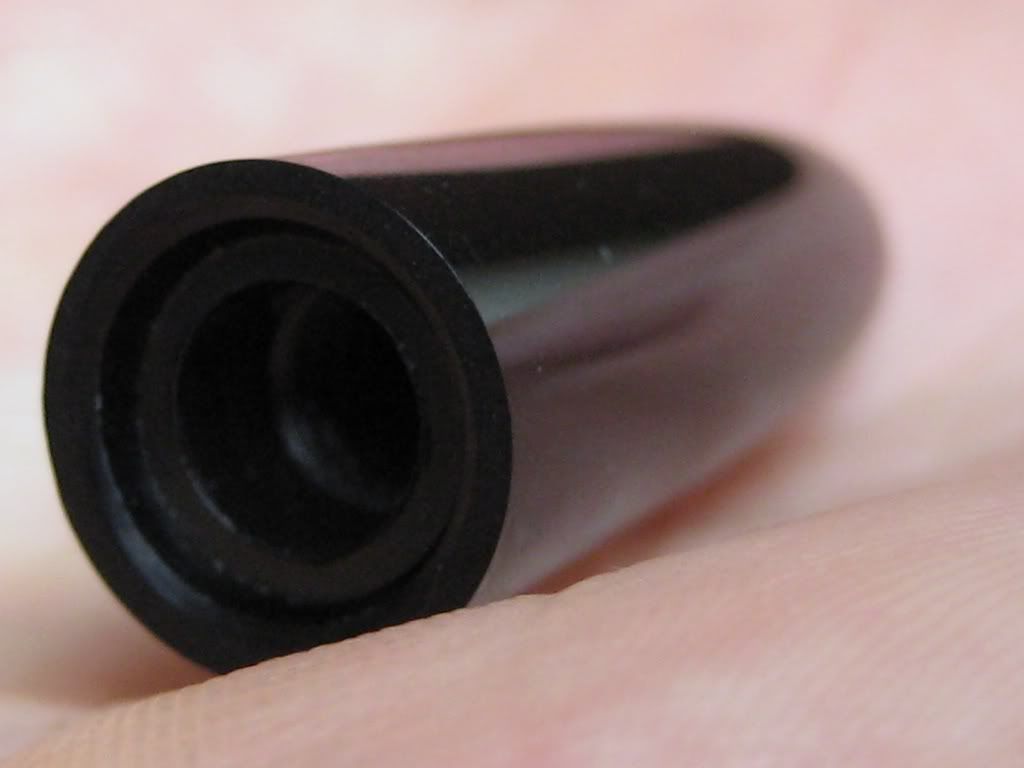 |
| The completed blind cap. |
As there isn't much to this post, I may as well lump in the scrapping of the squeeze-bladder filler.
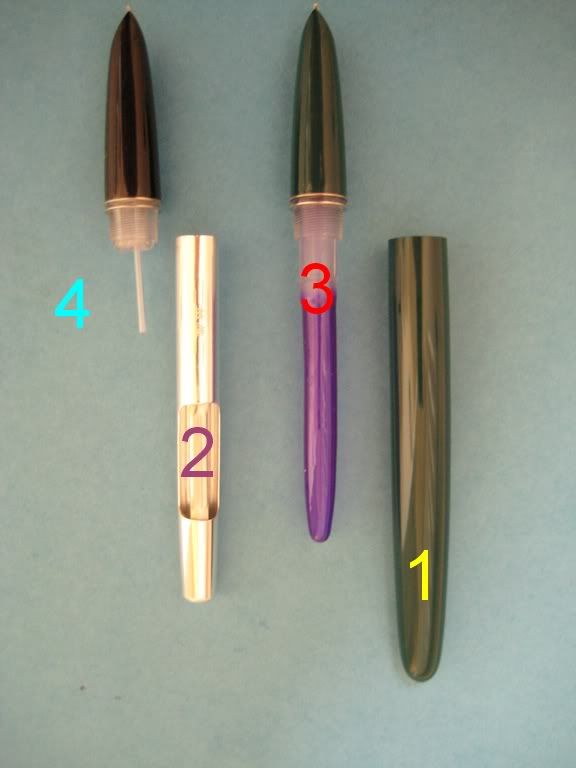 |
| Ditching the factory fitted squeeze bladder filler. |
1 - Unscrew the barrel!
2 - Pull the squeeze filler (a steel tube with a bent pressing bar) straight off the ink sac.
3 - Just after the barrel threads, cut the ink sac nipple off.
4 - Cut the breather tube to shorten it (this is so that it will stay clear of the vacumatic diaphragm at full extension, once installed). This example extends 2.9cm from the metal clutch ring on the section.
With the barrel cut, and the blind cap out of the way, we can make a start on what lies beneath it - the next post starts the vacumatic filler build.
No comments:
Post a Comment
Comments seem to be working okay again. You can try leaving one, it might work! If not, you can reach me on twitter if you like @Flounder_FPN