Tools required:
- A 12mm socket, preferably a hefty one (3/8" drive, is that the larger one? I can never remember).
- A couple of extension bars, so you can reach the bolts easily. The area is quite low down in the engine bay.
- A wrench (I used a cheap torque wrench)
- Grease, about a spoon full. The shop manual from Honda specifies a special Honda polyurea grease, but it's very, very expensive in the UK and my dealership didn't have any (what does that tell you). I used Castrol Red brake grease, to avoid damaging the rubber parts. Mintex's Ceratec brake grease is also safe on rubber, and has a 1000 degree boiling point so I'd probably use that next time.
To start with, here's a reminder of where the push rod is hidden:
Between the battery and the exhaust headers...
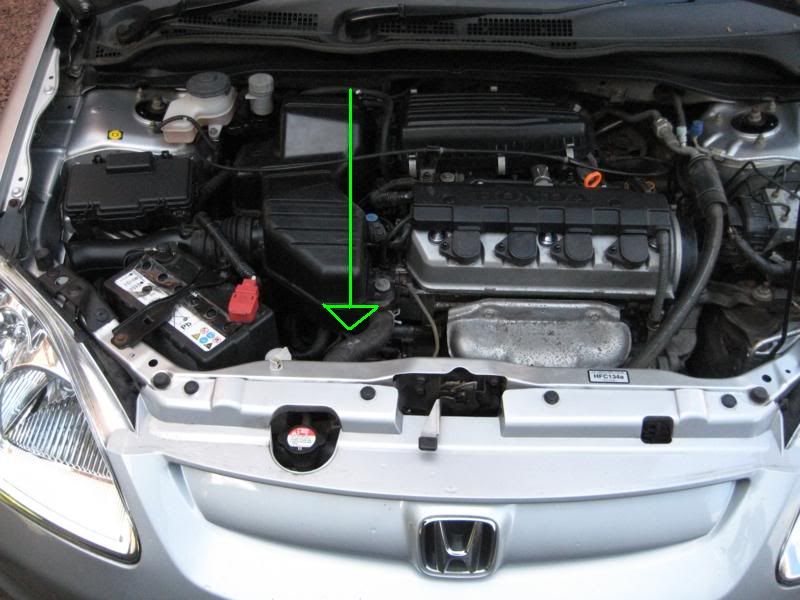
... Down there.

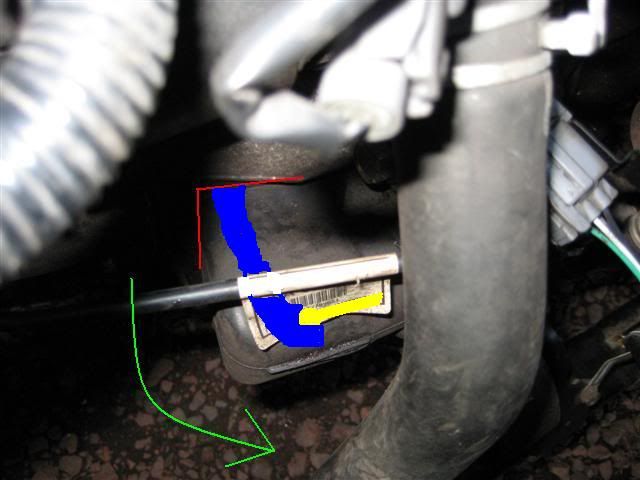
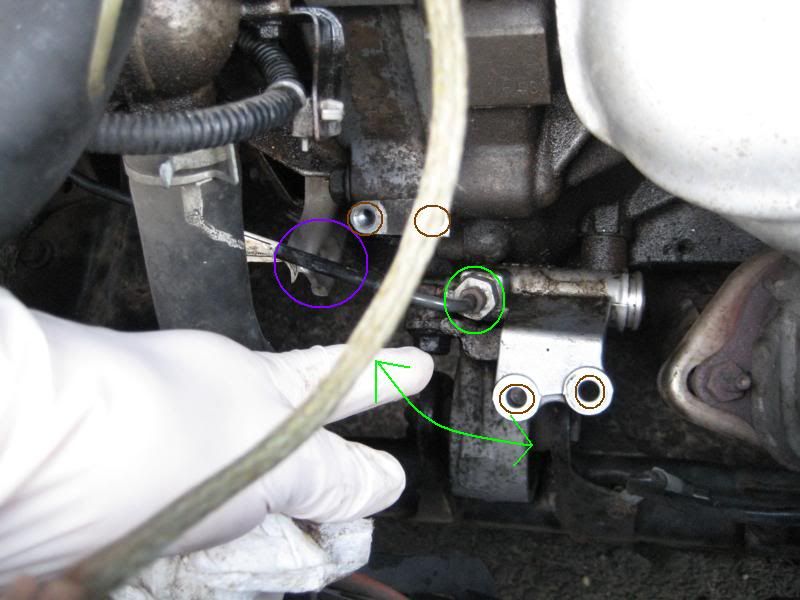
The slave cylinder's rigid hydraulic pipe (highlighted in blue) is fitted to the slave cylinder body with a spinning washer. It doesn't need loosening or anything done to it at all. When carrying out the next steps, bear in mind only to rotate the slave cylinder around the bolt as highlighted in green in the photo, especially when separating the ball end of the push rod from the socket it pushes against. This way, the rigid pipe isn't bent or stressed - you know you're doing it right when getting the ball end of the push rod out of it's socket takes very little physical effort.
First separate the grey electrical plug and socket, and move the two wires out of the way. Mine was flipping hard to separate, even with the locking catch pulled back. Unscrew the two 12mm bolts, circled in brown. In the photo below, the bolt on the left is obscured by the electrical socket. I've highlighted the slave cylinder bleed nipple in pink for reference only, don't open it.
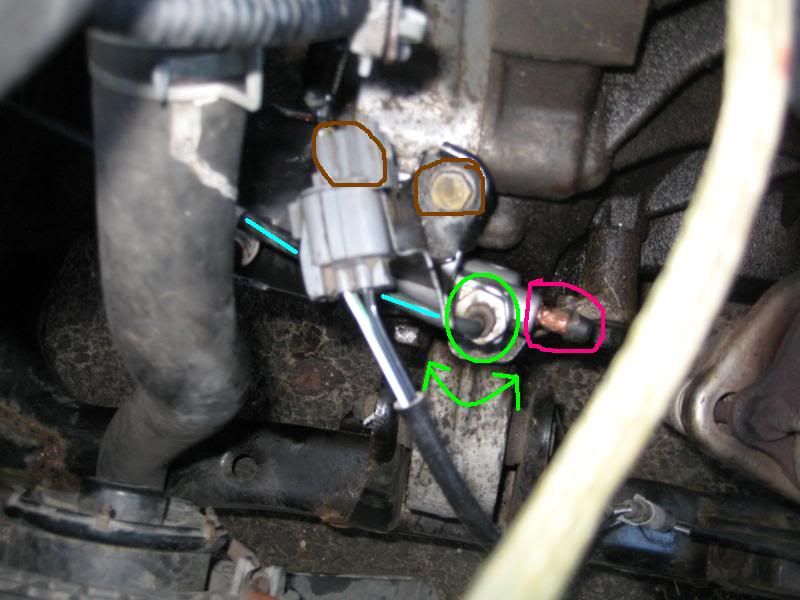
With the slave cylinder now loose, pull the rubber boot in the direction shown in green, to stick your hand inside it from the large opening (red) and have a feel around. Separate the push rod ball end from it's socket - the slave cylinder should be spinning on its axis, anticlockwise only. To show what to expect, I've drawn on a wobbly MS Paint x-ray of the push rod ball end, in yellow, and the socket it pushes against, in blue.
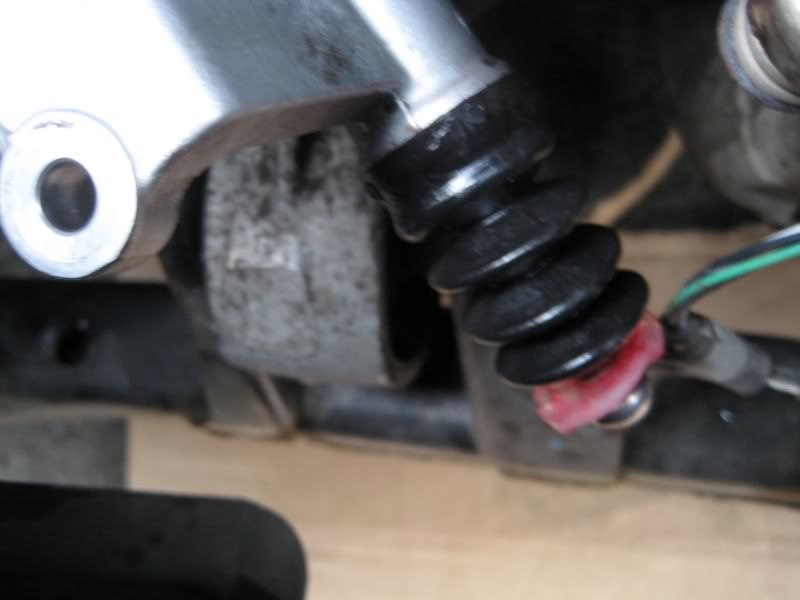
With the push rod freed from it's socket, the rubber boot can be pulled right off. After I did that, I span the slave cylinder 180 degrees, to give better access to the push rod. To take it out, pull the rubber accordion gaiter off its lip on the slave cylinder body. Donate the plastic collar and rubber gaiter to the new push rod, they just slide on from the back. In the photo below, I've lightly greased the new push rod and the gaiter with rubber safe grease inside and out.
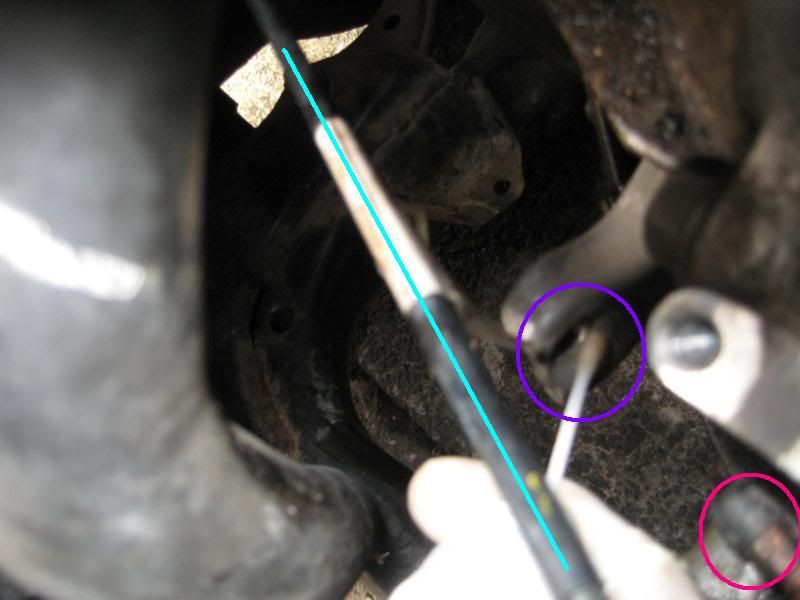
To regrease the push rod ball end, I filled the socket cavity it fits in with the Castrol Red. With the slave cylinder spun well away, access to the socket cavity (circled in purple, behind the hydraulic pipe) is grand.
Cleaning out the socket prior to greasing. Paper towels are fine for this. I used a little brake cleaner on a cotton bud too, there was no need for it really. I've circled the slave cylinder bleed nipple in pink, just to show the slave cylinder is spun well away from the socket. I pretty much filled the socket in with grease.
That's pretty much it! Fit the fat rubber boot over the new push rod's accordion gaiter, spin it clockwise, and click the ball joint back into its socket. Screw the two 12mm bolts back in, tighten to 22 Nm if using a torque wrench. Click the electrical plug and socket back together on their bracket, and have a feel around the rubber boot to make sure the fat square end is fitted in its cavity properly.
Silent clutch, and less than a tenner too. :)
Do you think a Silicone lubricant like 3M Silicone Paste (http://www.amazon.com/3M-08946-Clear-Silicone-Paste/dp/B005RNEH5O) would do the trick as well?
ReplyDeleteMost likely, yes!
DeleteI tried this, and didn't cure the problem. Mine turned out to be the pivot arm ball joint inside the gearbox that was creaking. To cure this I got car up on ramps so that the front end was up in the air, took the boot off the pivot arm that goes into the gearbox and sprayed WD-40 onto the arm, the WD-40 ran down the arm and onto the unreachable pivot arm ball joint - Problem solved! Silky smooth clutch!
ReplyDeleteRemember, Honda kindly left a split in the slave cylinder push rod boot for you to squirt lubricant through (see previous post), giving you a quick and easy way to tell if this push rod is the source of clutch squeaks.
DeleteAs a thin water dispersant, WD-40 will probably not last that long - you might want to pick up a can of spray grease at some stage :)