I started off the disassembly with some trepidation. I don't have any section grips or spark plug grips. I thought I would jerry-rig something out of a pair of adjustable pliers and rubber so there's be no scratching. In the end, I didn't even need those, thanks to the age of the pen and the warm water used earlier.
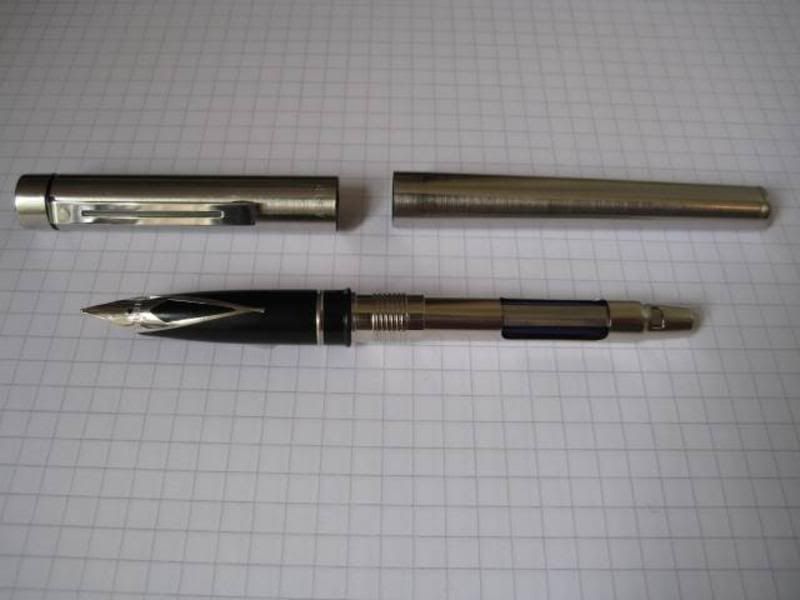
Here we are with the cap and barrel off. Baby steps eh? Rome wasn't built in a day.
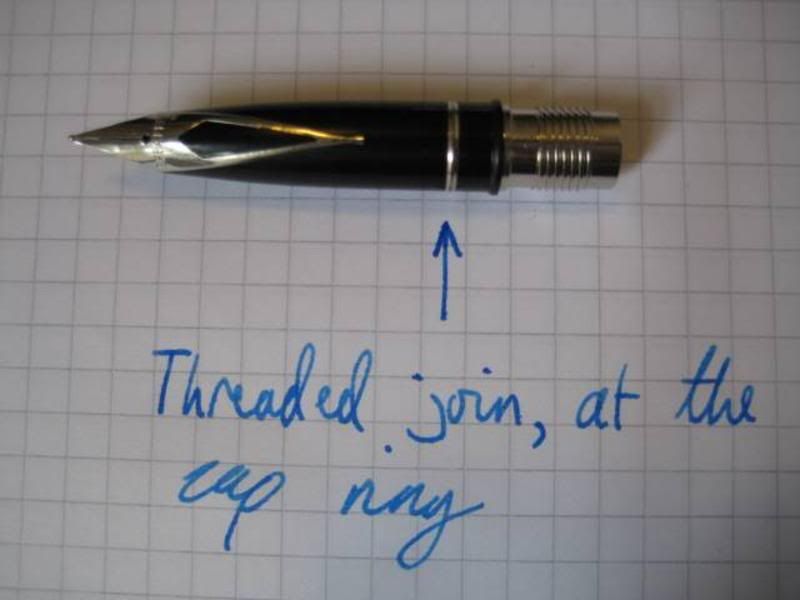
Thanks to the Pendoctor's article, I knew where to twist to seperate the nib section. It's here at the cap ring... But will it come apart, refuse to budge, or crack? I've never done this to a pen but have had some very tricky experience with corroded brake caliper bleed valves.
Revision - If it's recalcitrant, a thin wrap of blutack on either side of the join for traction and a little heat will work wonders.
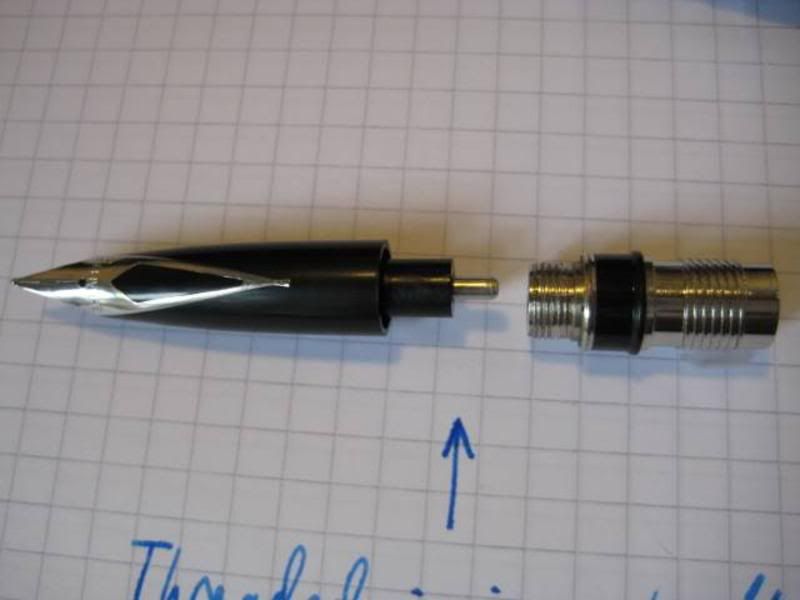
Astoundingly, these came apart using finger pressure. You can hardly see shellac in this photo, it had turned to dust!
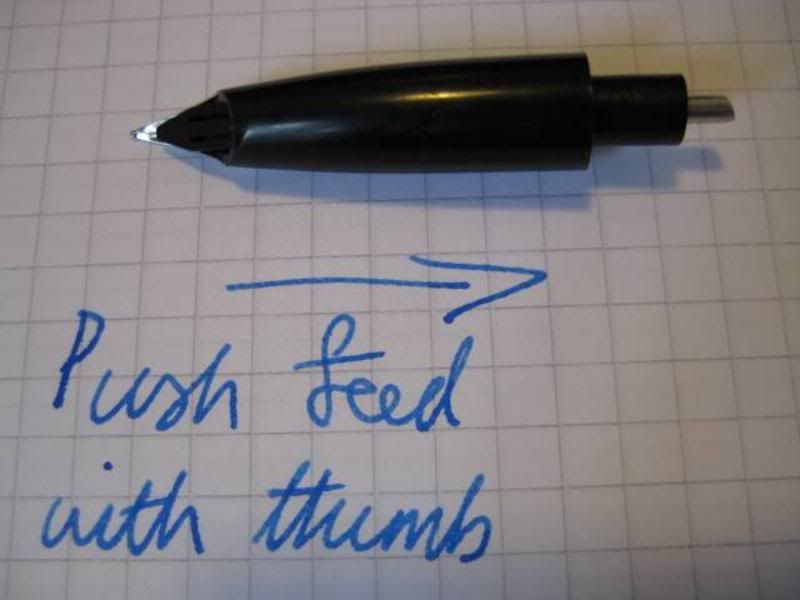
Safely unscrewed, I thumbed the feed out of the nib. It didn't take much pressure and wasn't glued in or anything. I was very glad to notice it fits in a squared off recess, so there's no danger of misalignment upon refitting. Thanks Mr. Sheaffer.
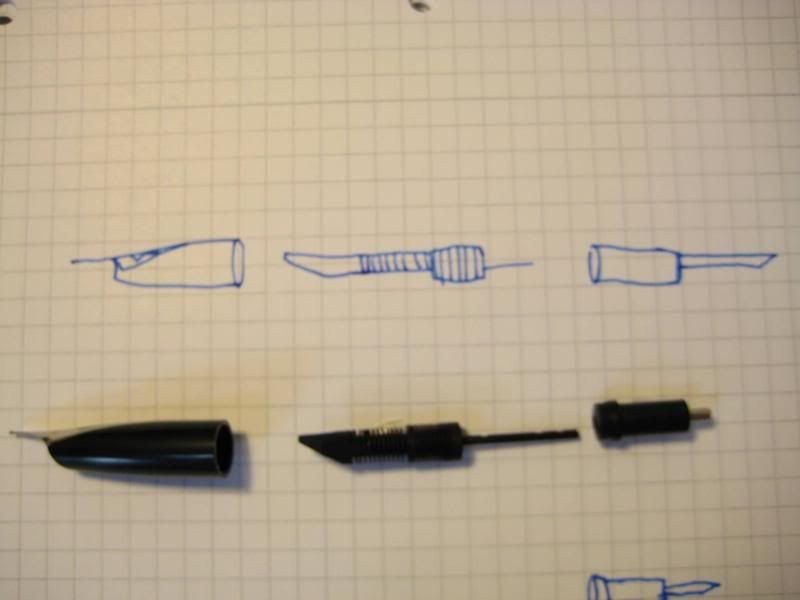
This photo shows the gubbens inside the nib: the feed, a rubber gasket , and the plastic thing that the converter or cartridge attaches to. I was immediately suspicious of that last one! Lets zoom in.
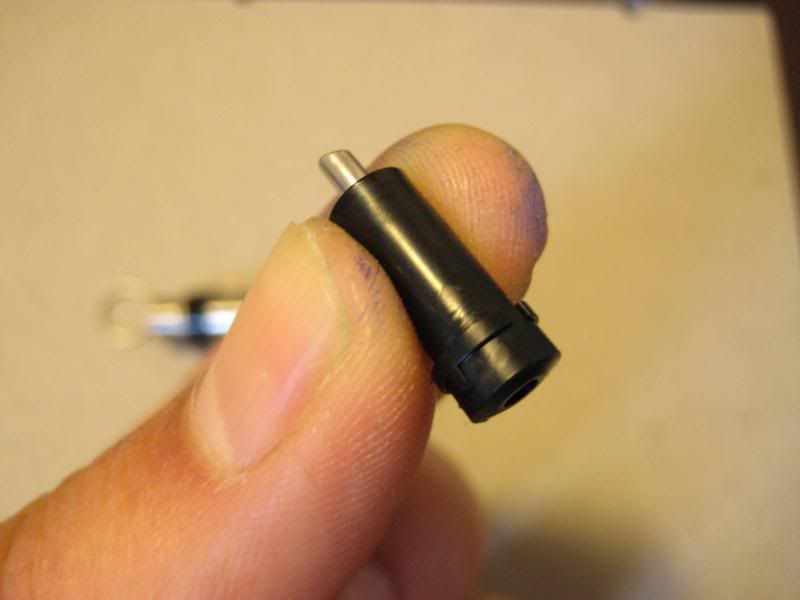
As we can see, the plastic thing that the converter attaches to is covered in keyed areas and recessed areas. A flashback to taking my laptop apart says making use of such keys and recesses is not optional :-) It sits in the nib with the topmost part of the diagonal slash in its tube in line with the nib, as in the diagram in the previous photo.
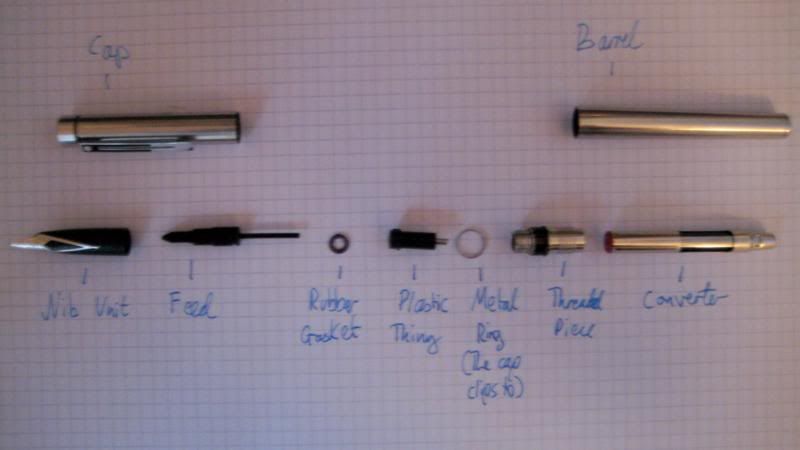
Here are all the bits in a Targa, in an exploded view, to make sure nothing goes missing.
Phew! I dodged a bullet with the seperation I think. The hard part is next, using the sealant.
I had a nice cup of Calmomile before attempting the main job, as you can see. I have no idea why some photos came out great and some not so great.
Revision - Now it is possible to remove permeated ink from the nib unit. With the shell now empty, wash it inside and out with soap suds and tepid water. Don't scrub at it, the membrane between the metal nib and plastic shell at the mouth of the shell is thin and weak.
Next, take a piece of paper towel, twist a length of it and pull it into the nib cavity. Lay another piece over the nib unit so that all areas where the metal nib and plastic shell meet are covered. A few drops of water will stick the paper towel in place, as shown in the photos below:
Leave it overnight, time does the work for you. The damp paper towel will wick the ink that has permeated the nib unit shell, and capture it as the paper dries:
Repeat with fresh paper towels until there is no more staining, and allow the shell to dry. In this way, the task of thoroughly cleaning out the ink before sealing is less involved, requiring just a few minutes of your time per day over a few days. Next post - resealing with Captain Tolley's.


Ever hear of an ultrasonic cleaner?
ReplyDeleteIf it's ultrasonic, how would I hear of it?
DeleteYou do raise a good point though; I prefer to err on the side of patience and caution, & would not risk any inlaid nib in an ultrasonic cleaner.
Thank you for this very informative post. I just bought a Targa from an FPN member that came inked and clogged (!?). After thorough and laborious cleaning, it's now writing but incredibly dry. Not sure if it's a feed or nib problem, but your instructions give me the confidence to attempt to address either issue. Thanks!
ReplyDeleteHi Glenn,
DeleteStubborn clogging is something I've noticed to be fairly prevalent in Sheaffer feeds of this era, it's a real nuisance. Once the feed is safely removed, I bet you find yet more stubborn dried up particles! Bah!
It's safe to sonicate the feed itself - a certain Fashion II feed took a crazy number of cycles before it ran clear - but again, I don't like to put inlaid nibs themselves in a USC in case it introduces more seep points.
Thanks for posting this ... It was a really really great help. The metal pin in the "plastic thing" was pushed in in my favourite Targa. This help me take one apart to fix the broken one!
ReplyDeleteWell my targa has been blocked for over a year now, and with the help of two elastic bands After warming up with a hairdryer, one targa came apart followed by a jolly good and careful clean up and is now working loverley.
ReplyDeleteThank you so very much for the most comprehensive advice, appreciated...