Although a large pen in the hand, the Kaigelu 316 did require a little trimming of the sails to make best use of the space available. In particular, the grip section on these pens takes up a lot of real estate within the barrel, as does the barrel's end finial.
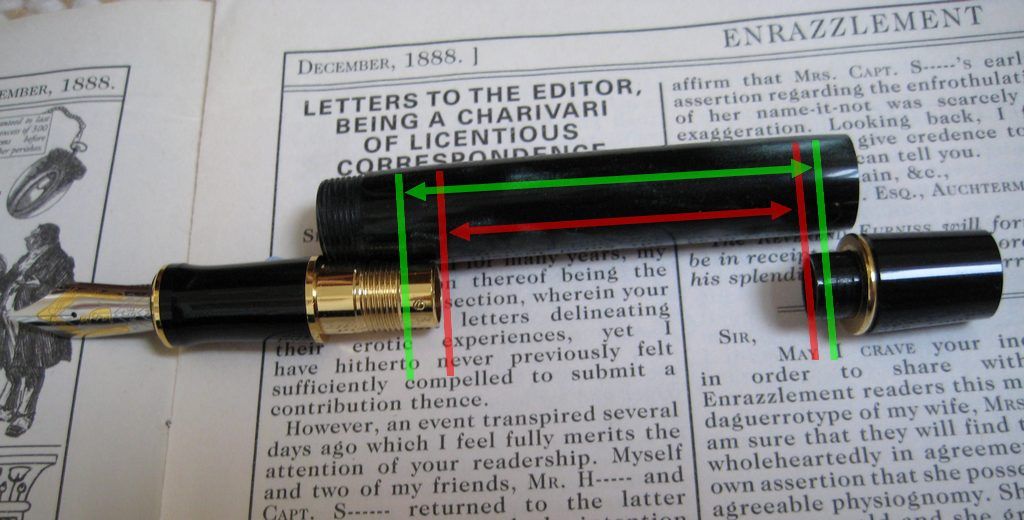 |
| Making space. |
In the photo above, the red area shows how modding potential is restricted before lopping off bits of the section and finial, and the green area shows the increase after. In particular, I had my eye on space taken up by the section for the vacuum release chamber.
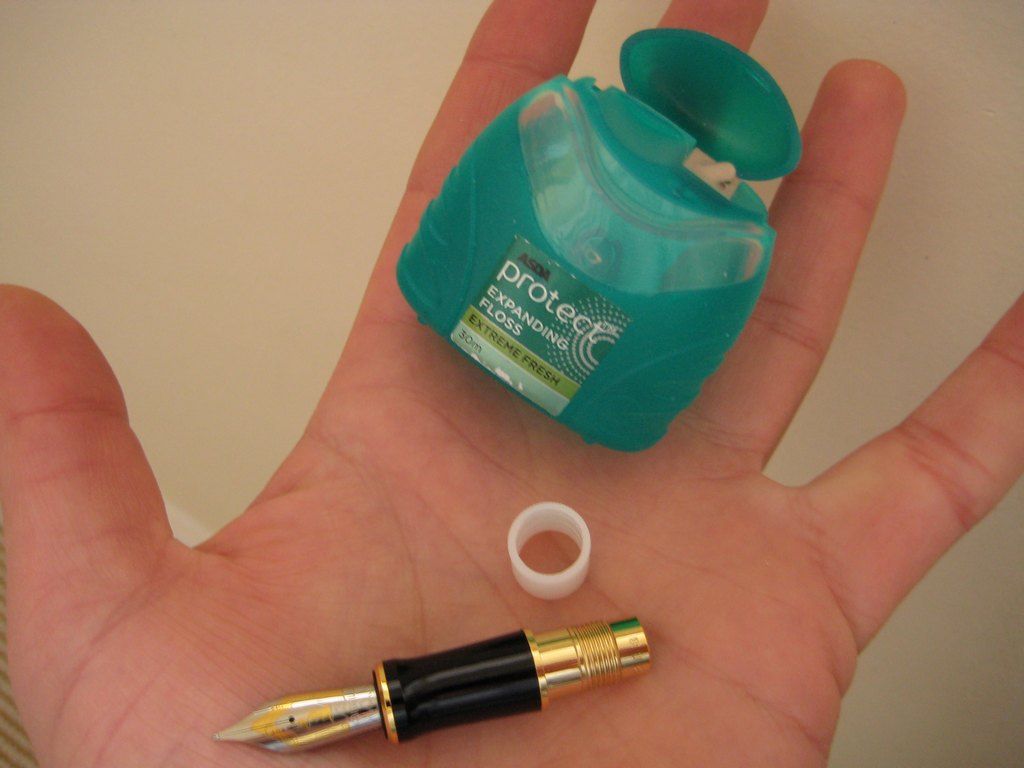 |
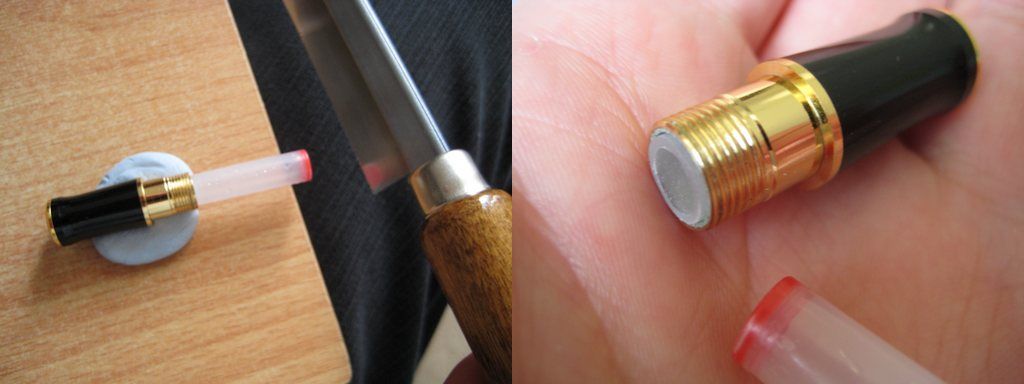
About to cut the excess metal from the section, using a spacer
from this empty dental floss reel to protect the threads from damage. |
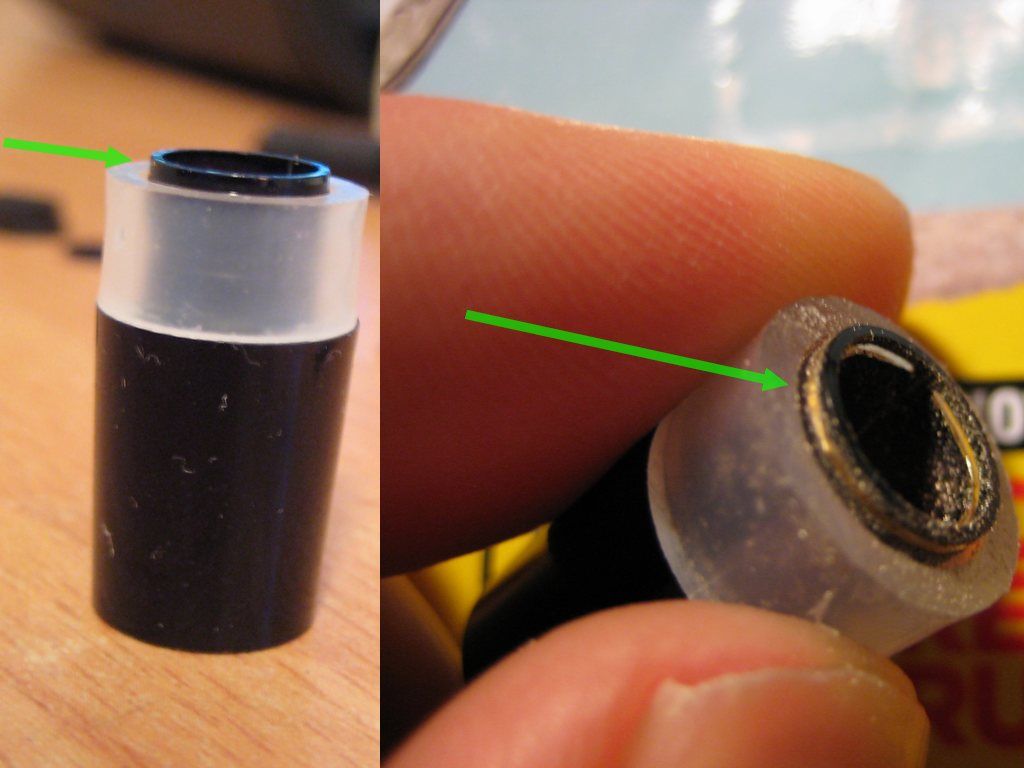
Cutting the section and finial
Using the craft saw last put to use during the
last two vacumatic Hero 616 mods, and a spacer to guard against clumsiness, soon made light work of the section's excess brass. At least, I think it's brass, going by the colour of the swarf in the photo below. It wasn't picked up by a magnet either.
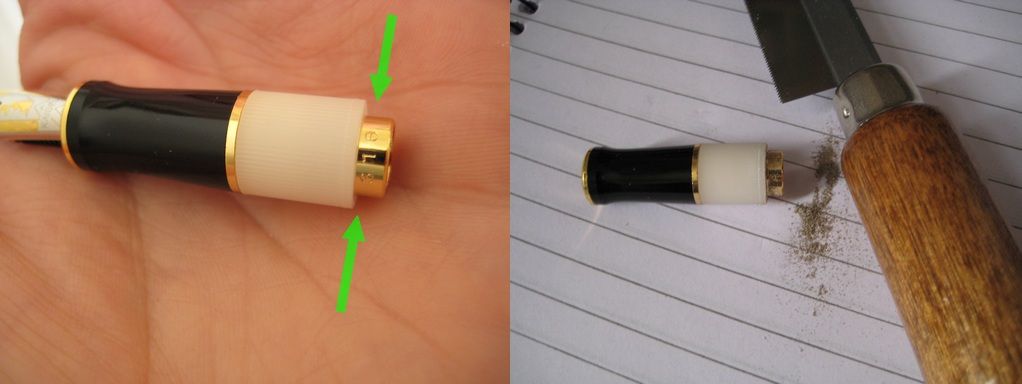 |
| Arrowed, left: the area of the section for the chop. Right - Sawing it off! |
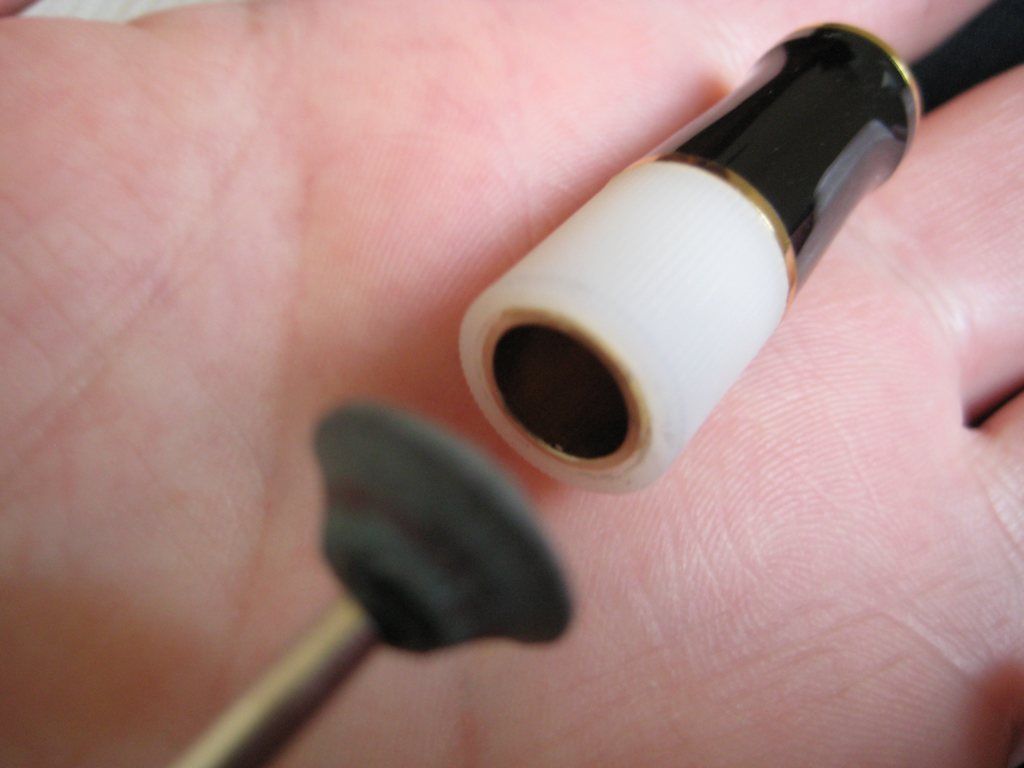 |
| Smoothing out the lip. |
I did this cutting with the section empty of the nib and feed, which are set in an all too easily
removable sleeve. This was the one time this pen's Achilles heel actually proved helpful.
A brief pass with the mini drill smoothed out the lip, and after a good wash, the section was ready for use... or so I thought! That weak sleeve was to make a nuisance of itself one last time; more on that below.
The barrel's end finial got a trim in much the same way as the section, using a spacer before using the razor saw.
 |
| The brass finial gets the same treatment. |
Securing the Section Sleeve
Ah, that troublesome section sleeve. By retrofitting this pen with a vacuum plunger filler, I had hoped the thing would cease to be an issue, as there'd be no cartridge or converter to exert mechanical force upon it during insertion. This conceit was soon exposed with the first test of the completed vacuum assembly! In fact, the pressure force of the filler's down stroke was enough to blow the sleeve, nib and feed out of the section like some sort of scribal curare dart.
 |
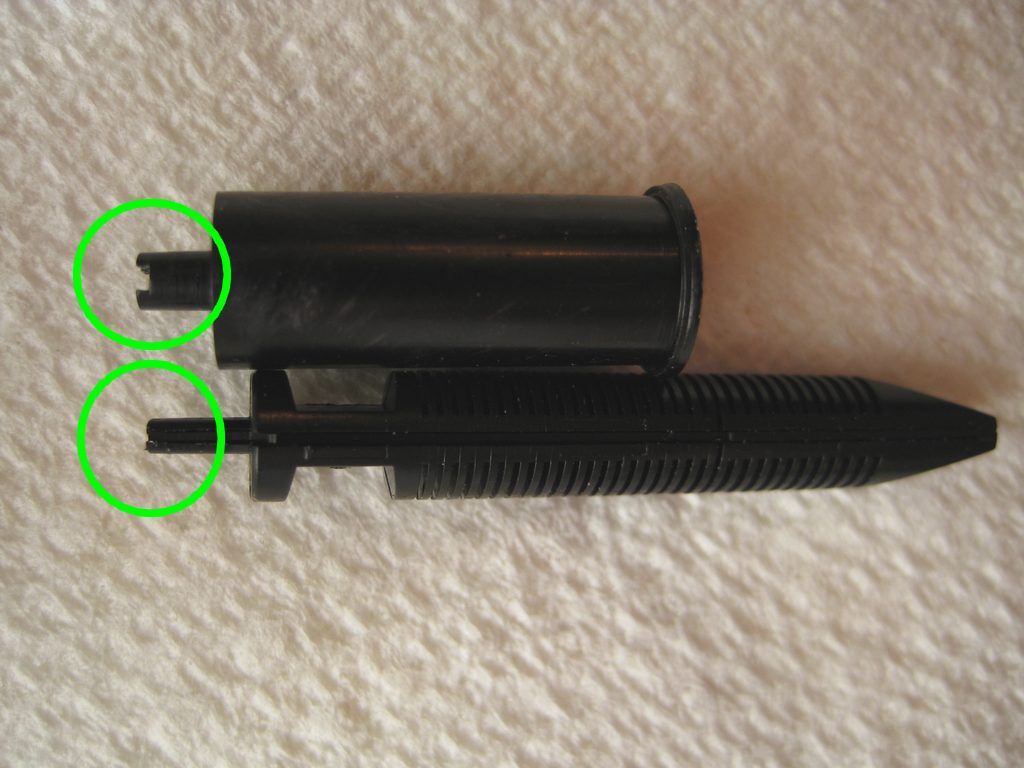
| The dismantled section, showing the nib, feed, sleeve and the problematic original converter. |
As this post caters primarily to the Kaigelu's yawn-worthy specific idiosyncrasies rather than the actual vacuum plunger conversion, I may as well round things off with the solution to the pesky section sleeve issue. The answer lies in cannibalising a decent quality cartridge.
 |
| Top: an empty Diamine cartridge about to save the day, pictured with a couple of villains. |
I was quite thrown by the pressure blow out issue, but soon realised that the sleeve would resist being pushed out the bottom of the section, if it were secured to something
above the section - something too large to push
through it. The screw in converter that came with the pen (no.3 in the photo above) was soon ruled out due to the awful radial cracks at its mouth (circled). A cheapo generic cartridge (no.2 in the photo) was a sloppy fit in the section. Only a decent Diamine cartridge actually
clicked solidly into the section, even
without the sleeve present. Perfect!
 |
| Cannibalising the Diamine Cart. | |
With the cart cut flush with the section, I roughened the exterior of both the cart and the sleeve to lend a key to a coat of shellac. Even the bottom of the sleeve's cartridge nipple got a thin smear before snapping them together, adopting the
thread technique first used way back during my first
Sheaffer Targa repair.
 |
| Foreground: The section sleeve & cart, next to the section. Background: plenty of shellac. |
Before bringing all the parts together, I gave the nib and feed a wash in soapy water. Have a look at this photo of the feed and sleeve, taken prior to cleaning and installing. I presume the cut-out area of the sleeve is meant to line up with the lengthwise channels in the feed, so kept everything aligned this way when reinstalling the nib and feed into the sleeve.
 |
| The sleeve and feed, prior to washing. After only a brief period, the exposed feed has picked up quite a bit of lint here! |
Strangely, I can't find any photos of the shellacked cart-sleeve-section, even though I took several at the time. The sleeve (fitted with the nib and feed) was shellacked generously, then inserted into the section. Then the entire outer surface of the Diamine cart was shellacked and snapped into place. To seal off the metal section from any ink exposure, the mouth got several shellac coats over several days. I've cropped out the picture below from the only photo I can find that shows this!
 |
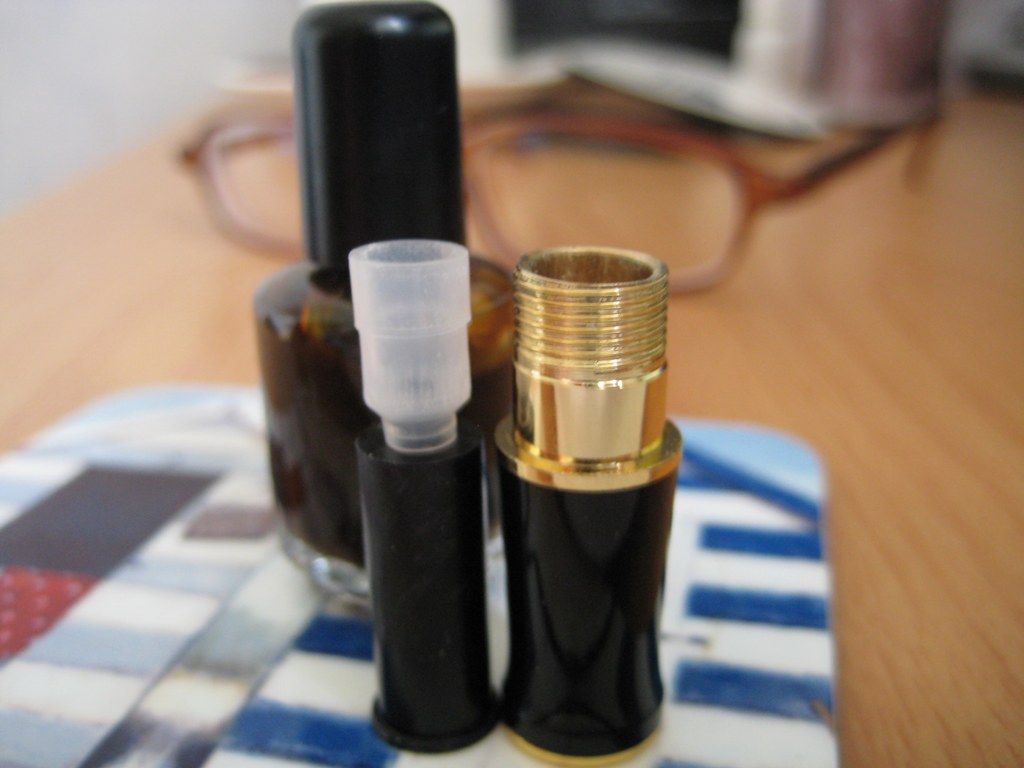
| The section, after all fettling was completed. |
On Flounder's Mindthots next time...
Phew! With all that donkey work behind us now, everything from here on in is 100% exotic vacuum plunger fun stuff, beginning with the ingenious
Goossens spindle. We step up a gear in the next post, in which the beating heart of this mod is skewered onto the
Control Rod.
No comments:
Post a Comment
Comments seem to be working okay again. You can try leaving one, it might work! If not, you can reach me on twitter if you like @Flounder_FPN