 |
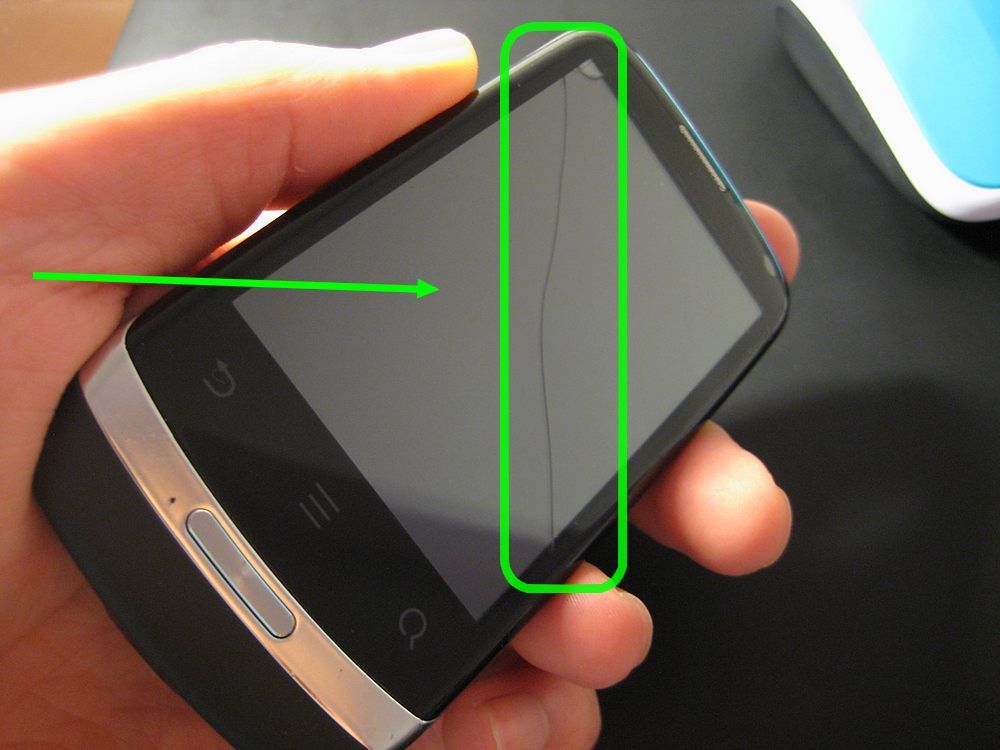
| Windex won't help this time! |
As thin as it looks, the Huawei Blaze is surprisingly easy to service:
- You can replace the touchscreen "digitizer" (the smashed fancy capacitive glass layer) very easily.
- There are no surface mounted components to solder, and there is no Apple-esque adhesive bonding the digitizer layer to the LCD.
- If you are prone to breaking plastic catches, that's fine too - they're all on the digitizer side, and you'll be swapping that out for a fresh one.
- There are only 10 screws to remove. They're just normal screws, not torx head or anything you need special screwdrivers for.
In my case, I bought an OEM Huawei Blaze/U8510 digitizer from a UK based eBay seller for £19.50, being too impatient to wait for international shipping. Let's push on to the step-by-step photos (click any photo for the hi-res blow ups).
Step One
Remove the battery cover, and take out the battery, simcard, and microSD memory card. There are 6 visible cross head screws to be removed from the back of the phone, circled in green. One is hidden behind a piece of anti-tamper paper, highlighted in red. I like to use sellotape and a crude diagram to stop myself losing tiny screws etc. during this sort of thing.
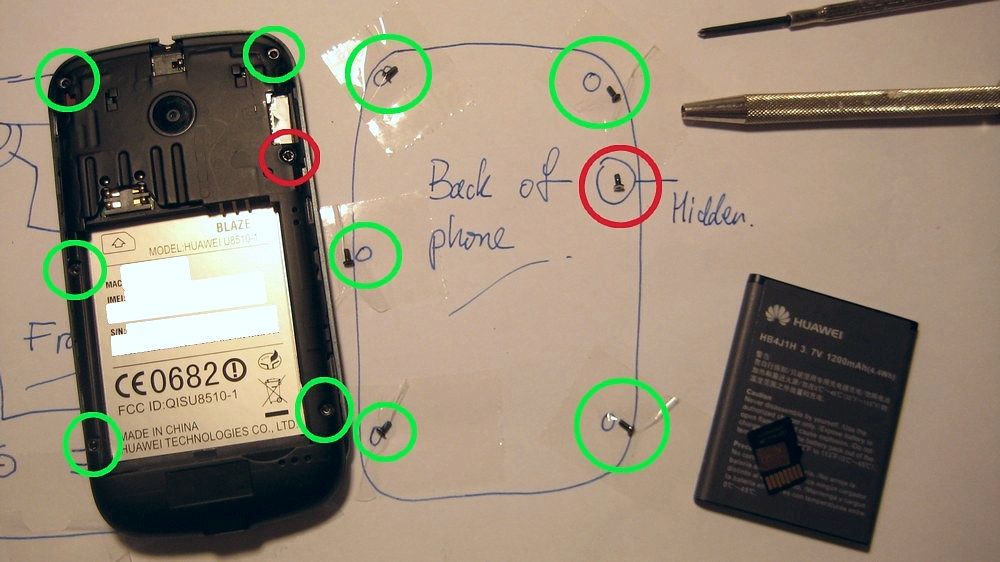 |
| Thankfully, there are no awkward disassembly surprises here. |
Step Two
Flip the phone over to its front, and remove the 4 visible screws, circled in green. That's all of the screwdriver work done with.
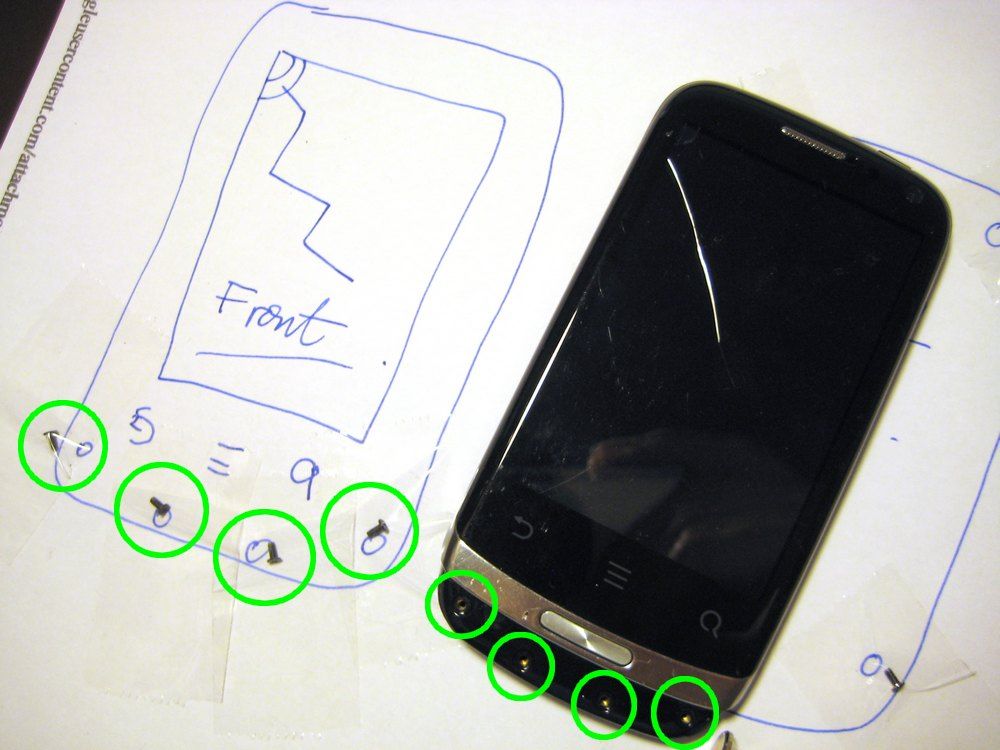 |
| Removing the rest of the screws. |
Step Three
Prise the digitizer from the phone using the transparent catches on the bezel surround (circled) . It doesn't matter if they break off, the new digitizer comes with a fresh surround.
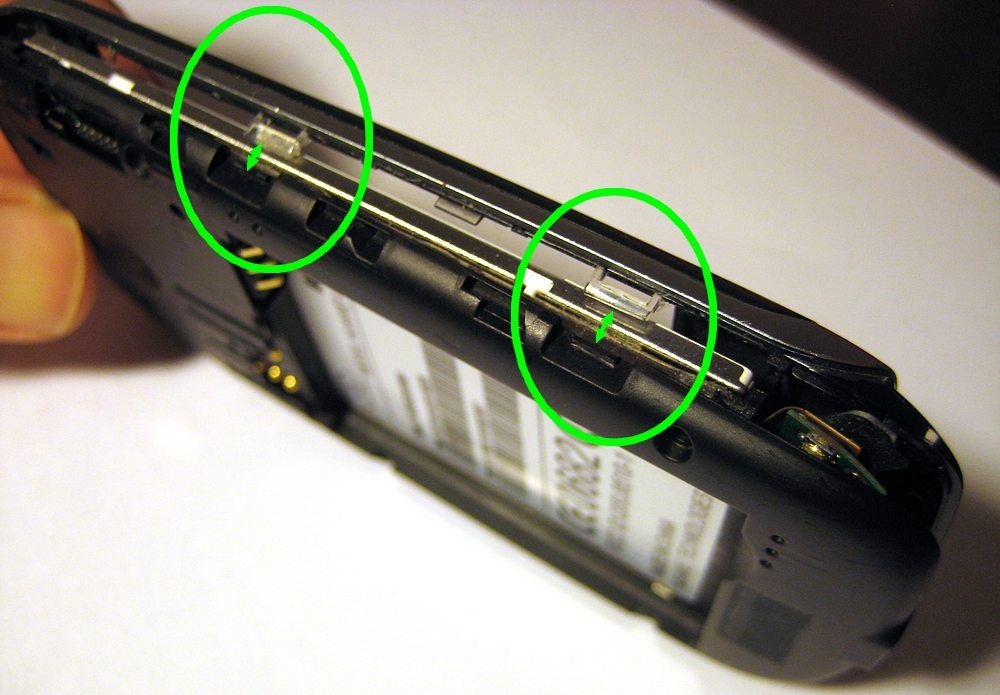 |
| Popping open the bezel catches. |
After freeing the catches, it is best to pivot the digitizer away from the phone from left to right, so as not to stress the short ribbon connector (arrowed in red). At this point, the rubber volume control (circled in blue) may fall out of the phone. Same goes for the metal home button and power button. Keep them handy.
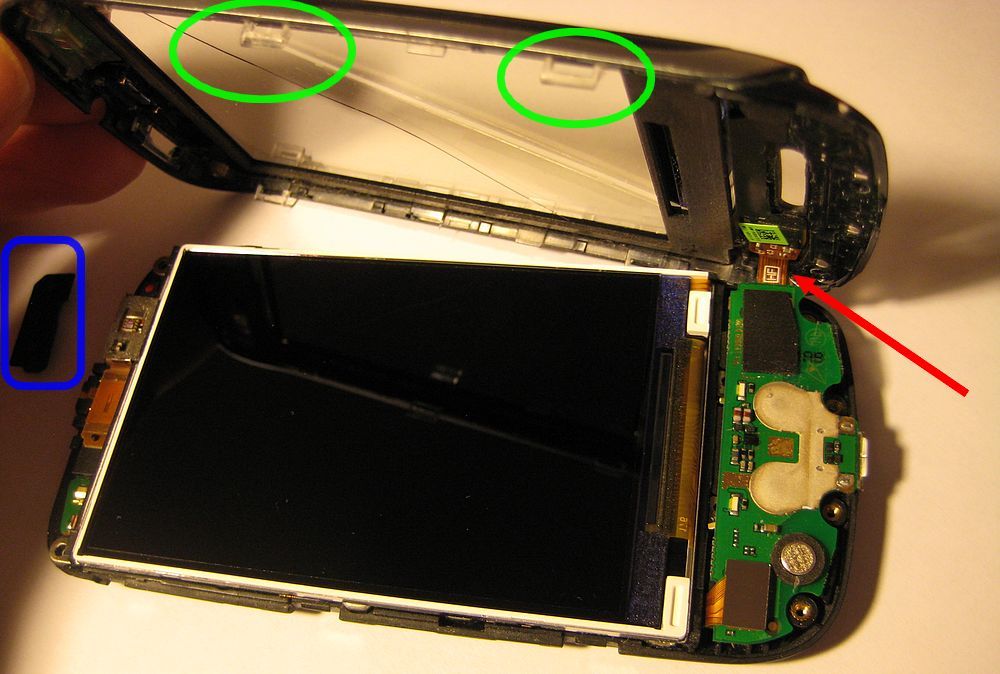 |
| That line you see across the LCD panel is just a reflection of the damaged digitizer layer. |
Step Four
Prise the ribbon's brown connector block from the backside of the circuit board to finally free the broken digizer from the phone.
 |
| Perhaps 'prise' is the wrong word. The connector block takes minimal effort to unplug from the circuit board. |
Step Five
Comparing the old and new digitizer, you'll notice that the £20 replacement cost doesn't quite stretch to the speaker and whathaveyou, highlighted in green. They're pretty easy to transfer over from the old one. I left the packaging cellophane on the new digitizer's glass, to avoid thumb prints during the swap over.
 |
| Comparing the old & new digitizer. |
Here's a close-up of the parts that need transferring. I found it easiest to remove the speaker from the old digitizer by pushing it in from the front.
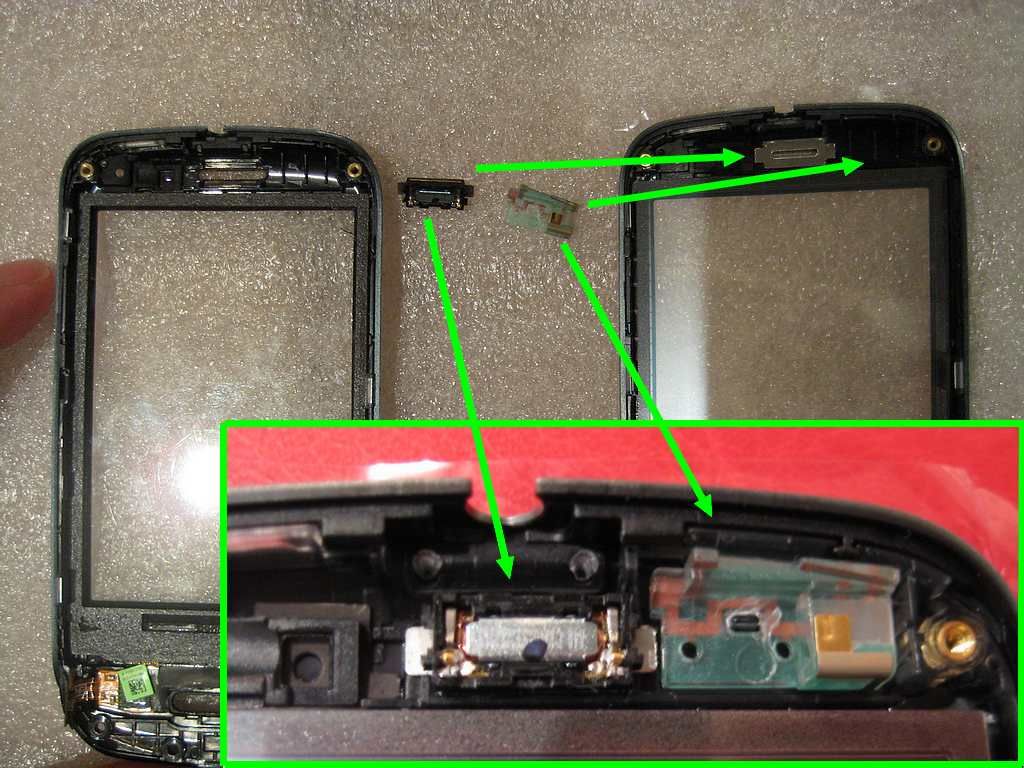 |
| Donor parts go here. |
Step Six
Plug the new digitizer's ribbon connector (circled in green) into the phone's circuit board. As the socket is on the board's backside, I found access made easier by first disconnecting another connector (circled in orange). After they're both reconnected, it's time to put the physical power, volume and home buttons back in position. Leave peeling off the screen cellophane (by pulling the tab circled in blue) to last, so the glass is kept smudge and dust free.
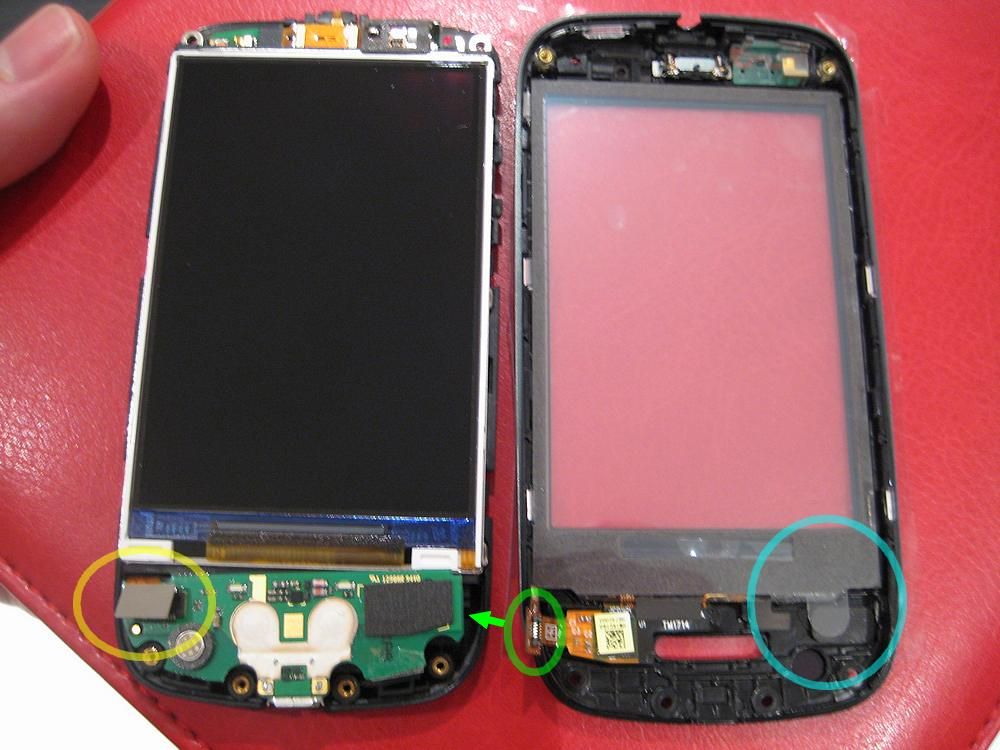 |
| Not long to go now. If you're a freak like me, you can use a small paintbrush to shift any dust from the LCD at this stage. |
Step Seven
Engage the side clips (circled in green) of the new digitizer to the phone, and replace the screws front & back. Insert the sim card, memory card, and battery.
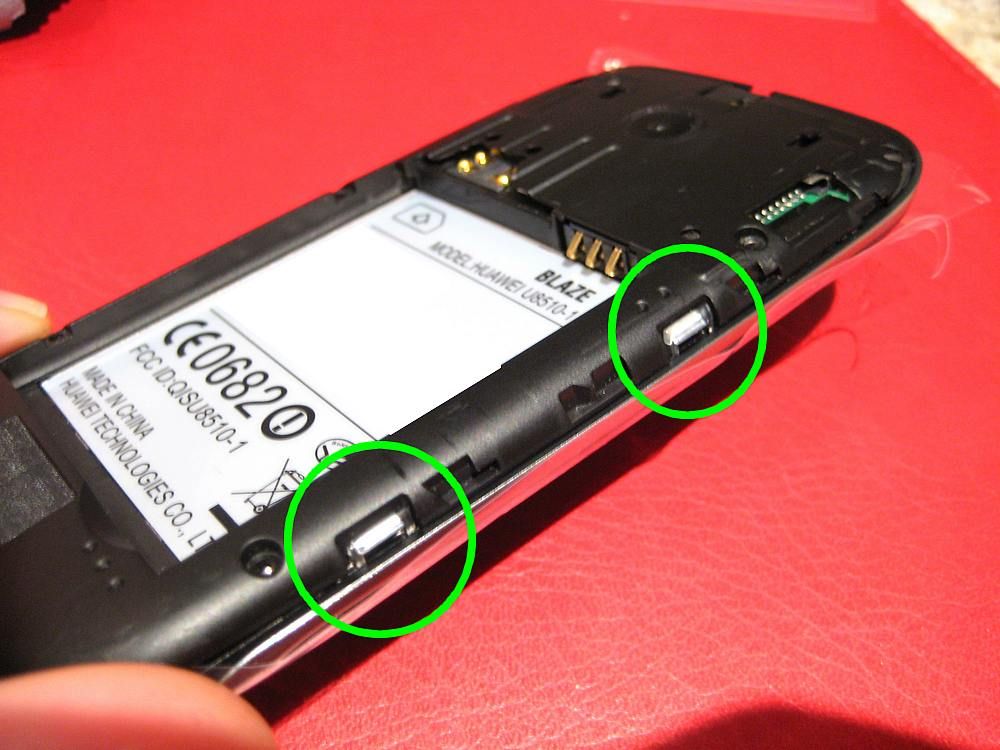 |
| Closing up. |
That's all! The screen looks dull in the photo below for two reasons; smart phone withdrawal made me rush the photography, and I had yet to peel off the outer protective cellophane from the new digitizer!
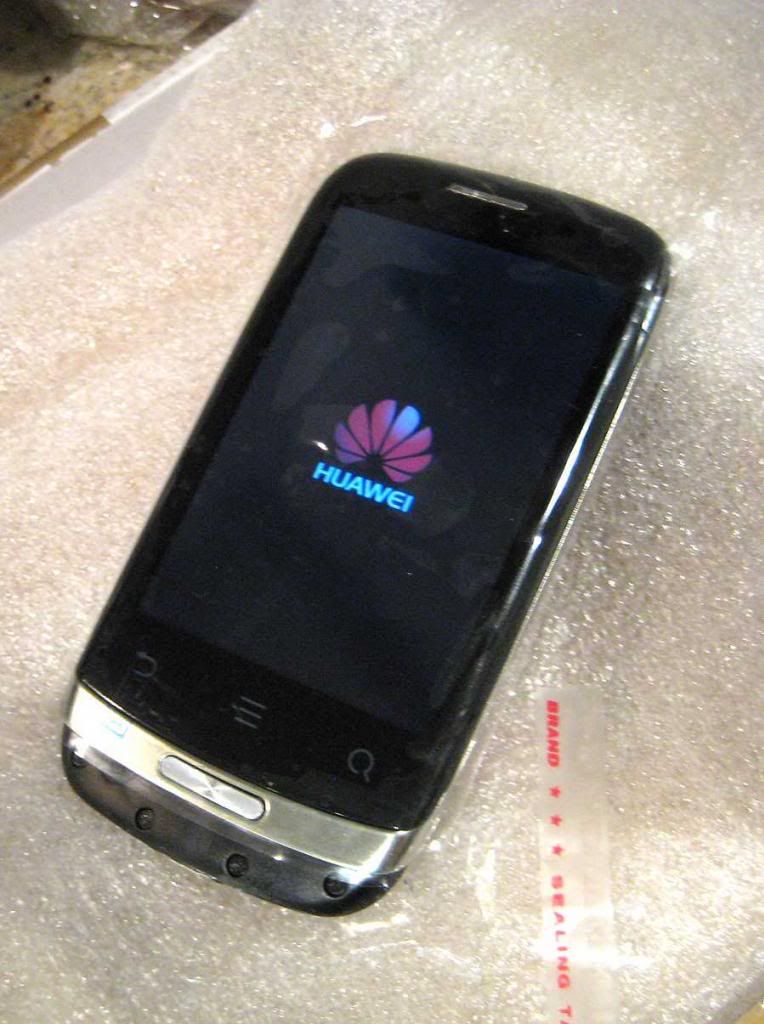 |
| Huzzah! |
Wishing you health, wealth & happiness for 2014,
Flounder
No comments:
Post a Comment
Comments seem to be working okay again. You can try leaving one, it might work! If not, you can reach me on twitter if you like @Flounder_FPN