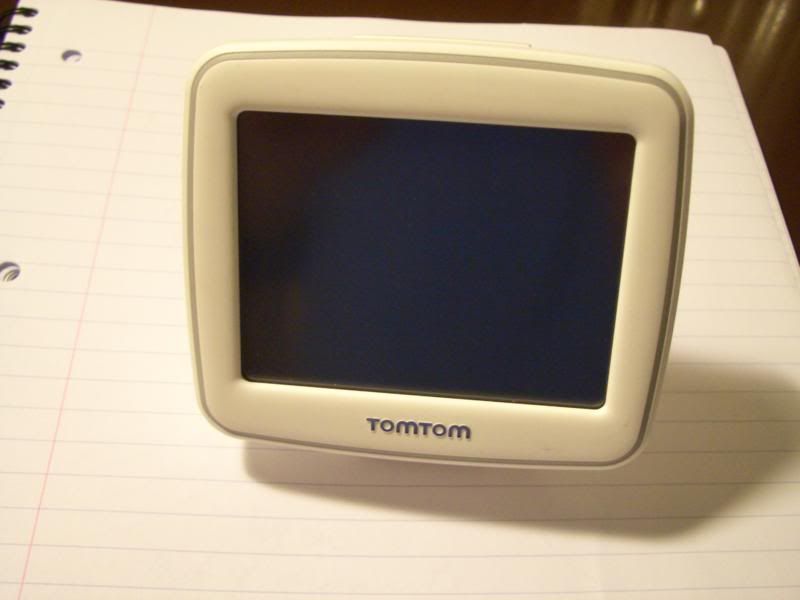
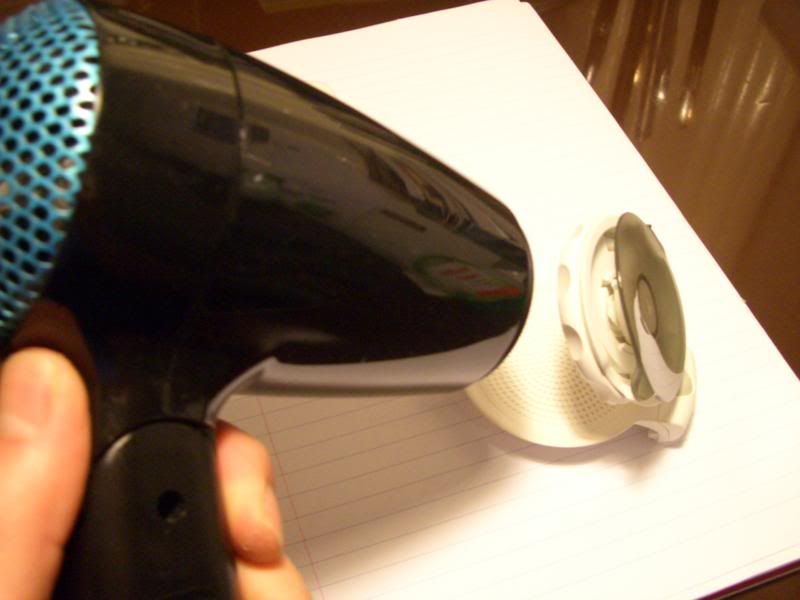
Sat Navs are a marvel and a treasure to people like me, especially on long trips. This example is a TomTom Start, an entry level model. The windscreen mounting system had been through some rough treatment, and was now jammed badly. Hopefully anyone with a broken TomTom windshield mount will find this post helpful.
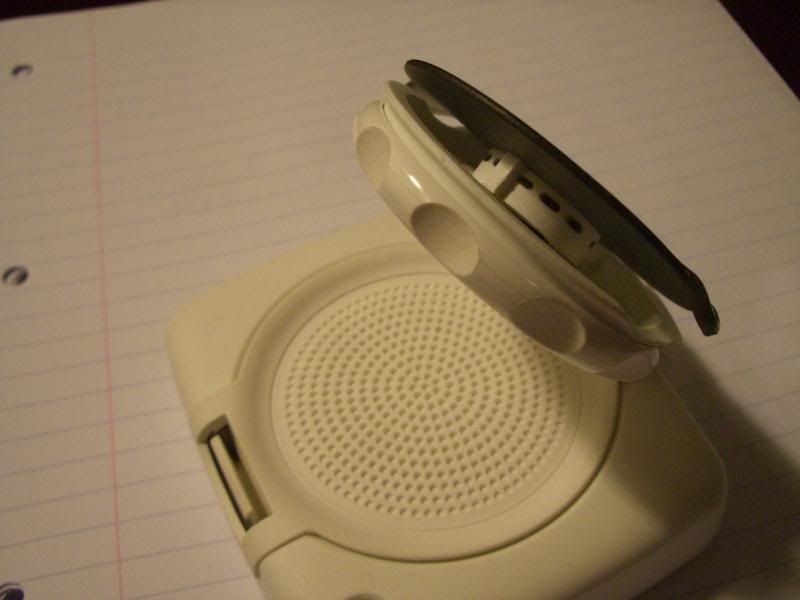
The design of the suction cup is quite clever; it folds flat against the back of the TomTom when not in use. When it's time to drive, the suction mount is unfolded, and a special grip rotates to lock it to the windscreen, or release it. The photo below shows the back of the TomTom, its suction mount, and the jammed up mechanism that locks & releases the suction cup.
Incidentally, every photo was taken with a Casio digital camera, featuring the 'lens error' they are famous for, and an indifferent white balance. Awfully sorry!
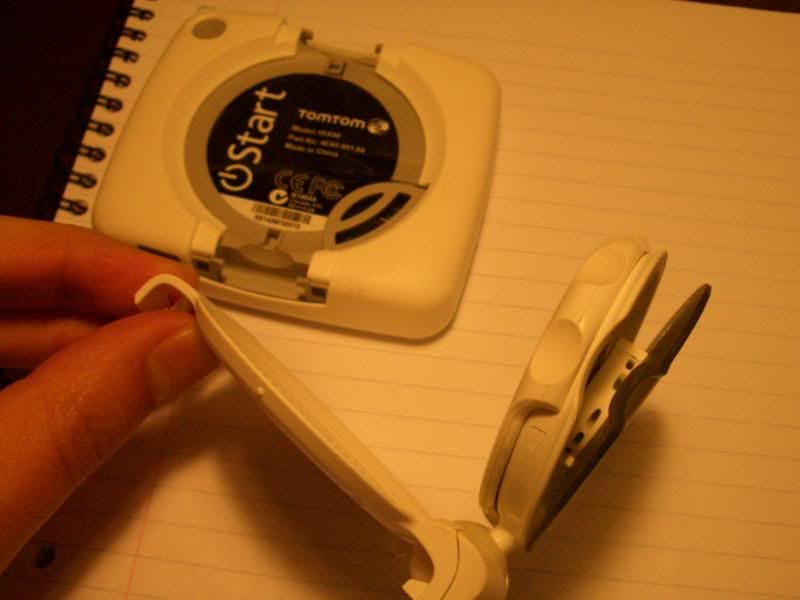
As the suction cup wouldn't pop back in with a bit of persuasion, I decided to try taking the mount apart, and then reassembling. First off, I unclipped the mount from the body of the TomTom:
Here's a close-up of the problem; on one side, the rubber cup has come completely free of its corkscrew fitting, whilst at the same time being jammed solid on the other side.
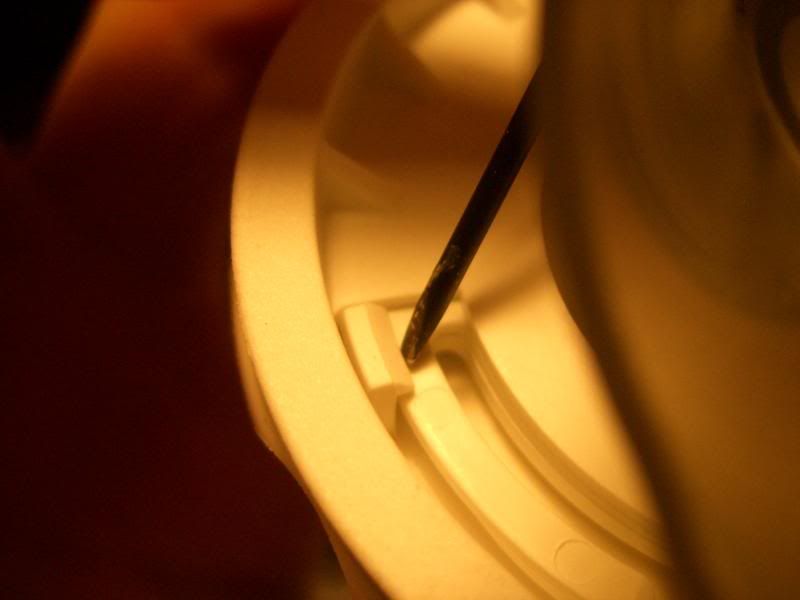
There's an awful lot of plastic in the mount's construction, rather than metal - I imagine metal would have stood up to rough treatment better, but would have been too heavy. Plastic has a tendency to snap under stress, so I gave the mount a quick blast with a hairdryer to soften things up a little before attempting disassembly...
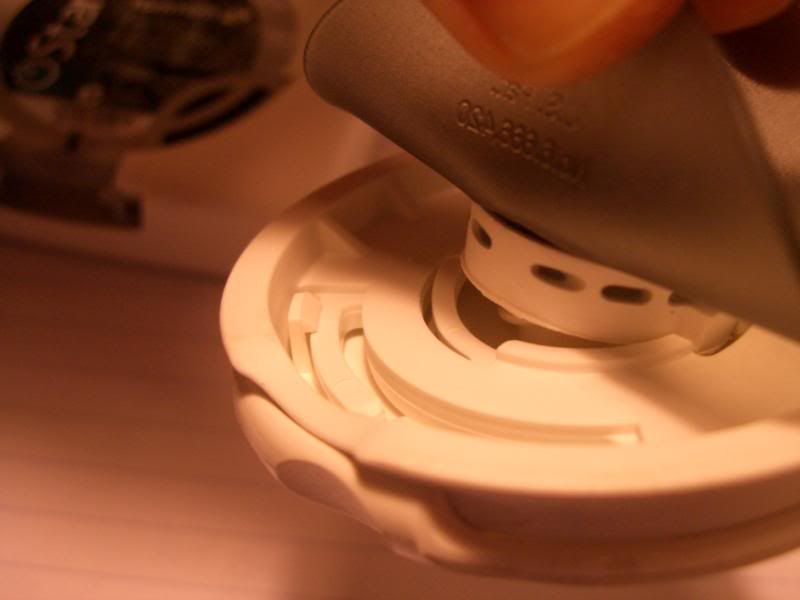
...then set about prising the mount apart. On either side, there is a connector holding it all together. This next photo shows one, about to be prised back with a thin screwdriver. Without prior heating, it would probably just snap off.
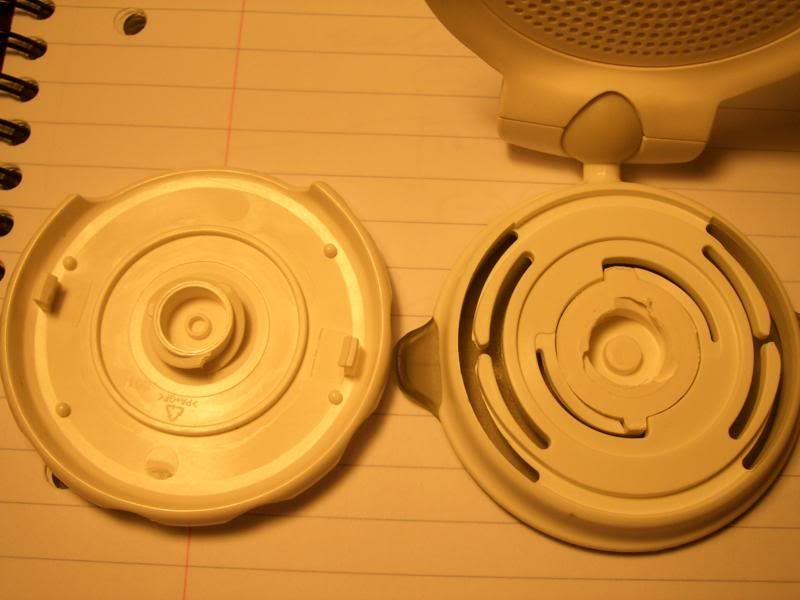
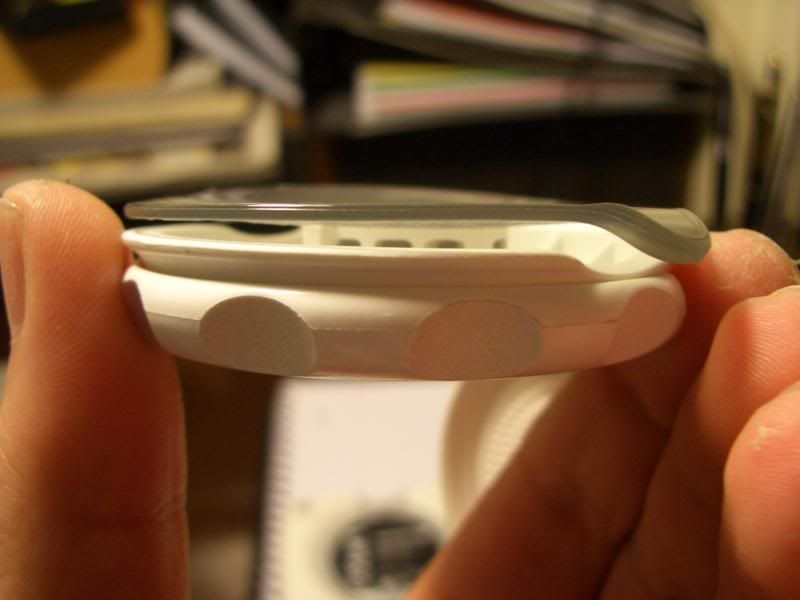
Once both connectors are released, you can seperate the parts. From left to right in the photo below, we have the rotating bezel that locks and releases the suction cup from the windshield, the suction cup, and the back section that clips to the TomTom. You can see that the centre piece of the suction cup has gotten a little chewed up.

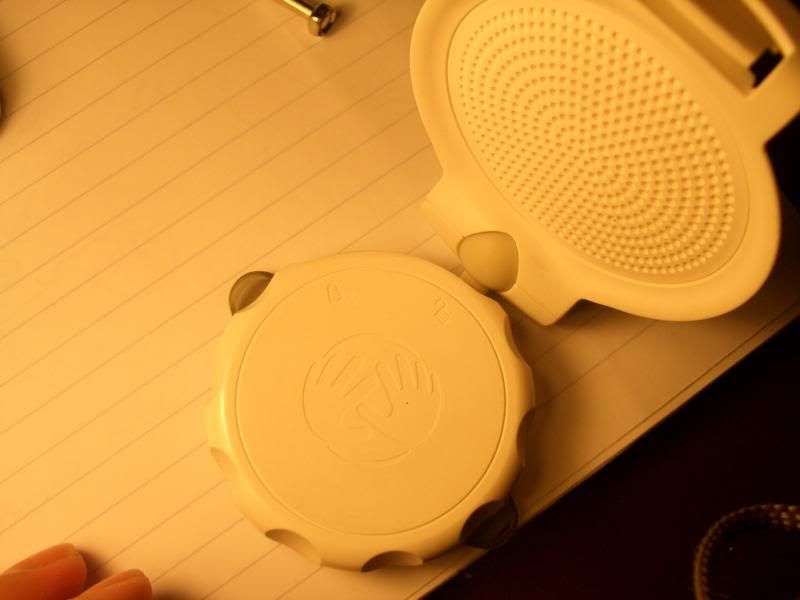
To put it all back together, place the back section over the suction cup. There's only one way it fits into place, as shown below - the thicker tab of the suction cup facing up, towards the ball joint of the back section.
Now flip the rotating bezel over and place it on top. The symbol of an open padlock should be aligned with the ball joint as shown in the next photo...
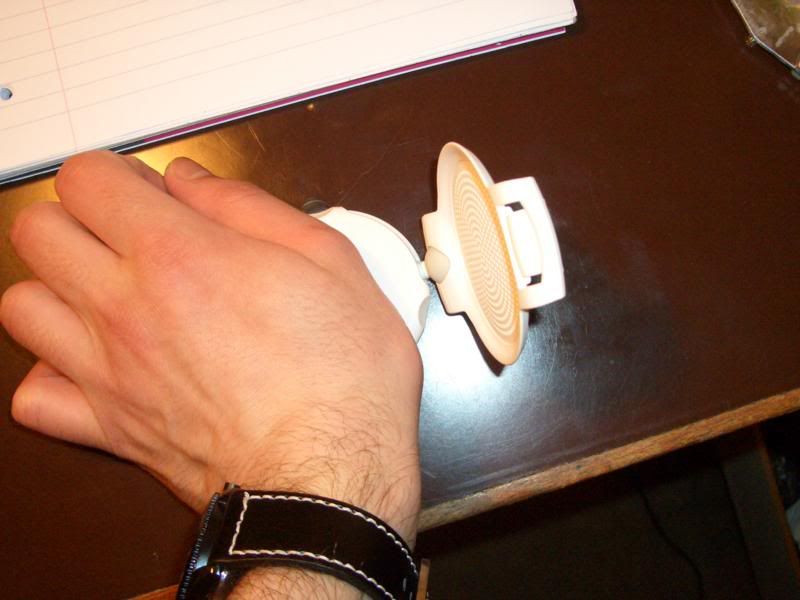
The final step is a bit tricky. You need to push down with equal pressure to ensure the connectors at either side of the rotating bezel clip onto the back section simultaneously. Otherwise they might well break, or at least one will not engage. I used the palm of my hand and a flat desk.
When the connectors engage, try rotating the bezel. The suction cup should move in and out evenly. Here's a photo of the fixed mechanism.
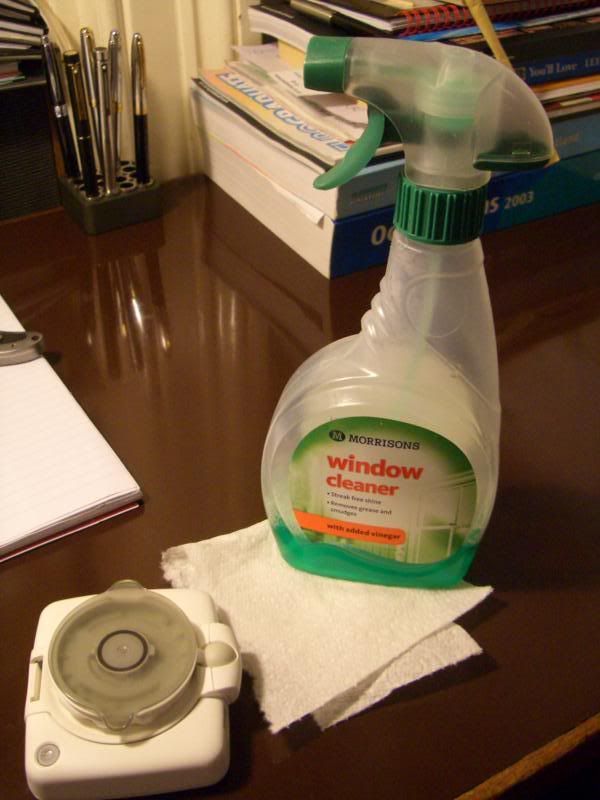
After all that fettling, the suction cup will be covered in fingerprint grease, dust, and what have you, reducing its adhesive properties. A wipe with some window cleaner cleans it up for the next time you stick it to the windshield.
All done! Thanks for reading.
Thank you so much! I tried to fix my first one with no success and then purchased a second mount. Once it broke and came apart in similar fashion...figured that it may be a more common problem. Visuals were great and detailed explanation of how to reattach was spot on.
ReplyDeleteThank you!
great instructions!- these mounts are not very resistant to impatient people... helped a lot when fixing mine!
ReplyDeletesome improvements in explanation I would add is that at the last step you need to 1) put some support under the suction cup (a box of makeup blush is perfect) so that the back section center sticks our fully 2) when aligning the top with the bottom part, you might want to look from the side how they align.
Thanks again!
You saved me, i broke a friend's mount. This method was great, many thanks.
ReplyDeleteYou hear that, Buddha? Tell Santa to send some karma down my chimney!
ReplyDeleteThank you so much, this is the second mount which I have tried to fix and there is little more infuriating in the world! Thank you for saving my sanity!
ReplyDeleteThank you so much. With a little searching I found this how to on google (the only one I found I might add) and it worked! Thanks again!
ReplyDeleteBrilliant, thank you. I had spent many less than happy hours trying to figure this out before discovering your experts guide. This has saved me the cost of a new mount, have a virtual pint on me!
ReplyDeleteIf the little clips are moved over the gaps, then it doesn't need to be heated and pops out, one side at a time, with moderate force! :-) Nice guide, thank you, was helpful :-)
ReplyDeleteI found this is not the way to reassemble. It was very easy to snap the rotating bezel and the back section together. Rotate so it is in the unlocked position. Mine came with a spring which at this point gets inserted in the center of the bezel. The suction cup gets placed on over the spring with the little center tabs on the suction at the top of the ramps leading to where their holes are (small to small, large to large)and mate the screw threads. Give it a twist toward the final holes for the little tabs until you hear a little snap, and then you are done. Real easy.
ReplyDeleteHmm I don't get it. I have the spring too I can assembled the suction together with the back but cannot attach the bezel. How can I put it in a ublocked position as you say. Sorry I'm not good at this. Thanks
DeleteHmm I don't get it. I have the spring too I can assembled the suction together with the back but cannot attach the bezel. How can I put it in a ublocked position as you say. Sorry I'm not good at this. Thanks
DeleteI'm fairly certain there's no spring on this model - keep in mind the design of the TomTom suction mounts can vary between models.
ReplyDeleteThanks for reading, and I'm sorry this guide wasn't helpful in your case.
Thanks Flounder, most helpful. You and Autoworkhorse have saved my sanity. Mine is the type with the spring, so all of these comments were great.
ReplyDeleteMany many thanks. You helped me fix the mount for my XXL 540.
ReplyDeleteGreat stuff! Fixed on second attempt.
ReplyDeleteAutoworkhouse - thankyou, couldn't work out why the described method wouldn't work, yours did first time!
ReplyDeleteMany thanks guys. Mine slightly different design to Flounders' - mine has spring. Autoworkhorse described perfectly. Once i'd carefully studied the mating parts it was a simple place and twist - job done.
ReplyDeleteThanks a lot Flounder. Mine has the spring in the centre too, but with your pics and the description you presented I got my tomtom mount sorted out. Thank you once again and have a virtual pint on me to.
ReplyDeleteHappy to help - if I get round to breaking my TomTom XL mount, I'll be sure to update this post with photos for that model too.
ReplyDeleteI have the problem of the suction part with the plastic bit it is fitted to detaching from the main assembly. I then have to relocate it making sure the two different sized lugs are the right way round and keep it slightly in the locked position so it does not part company again. The problem usually happens when fixing to or taking off the windscreen; so I try to be extra careful. I still get caught out though!. Does anyone have any solutions to this problem?
ReplyDeleteThanks for your photographic guide, couldn't have done it without. It went back together almost as easy as it fell apart.
ReplyDeleteFlounder you are a genius!!! I struggled for a couple of hours until I googled and found this post and all became clear. Final step was tricky until i used your tip of warming with hairdryer. i warmed both parts of connector and it worked like a dream. Thank you very much
ReplyDeleteHi Flounder, nice post! It helped me very much. Just a little correction for the final step.
ReplyDeleteBefore pushing the bezel clip down on the open padlock position as described, keep the back section firmly and rotate the suction cup clockwise as much as it is allowed, only then you can push it down easily and without breaking anything.
Thanks to Flounder and Autoworkhorse for the tips. My model does have the spring, and I found that I couldn't engage the bezel to the thread on the central plastic moulding of the suction cup. I overcame this by placing the centre of the suction cup on a couple of £1 coins to force the plastic mount through the mounting bracket, so that it sat proud. I could then engage the thread of the suction cup plastic with the bezel, then turned the bezel about 20-30 degrees for the bezel clips to go past the partial ring near the hinge and opposite side before removing the assembly off of the coins, placing on a flat surface and pressing the bezel home.
ReplyDeleteThank you Flounder, this just made my wife feel a lot better. She broke the mount yesterday and was so sad and worried because we are about to get on a road trip. I found your article and followed your instructions. It was perfect. Mine is a TomTom GO 1005 so the last bit was different. Instead applying pressure, it was a simple rotation to fit nicely. The mount is back as new. Thanks again.
ReplyDeleteGreat article with clear, useful, and well-structured insights. The topic is explained in a practical way, making it easy for readers to understand the key points and apply the information confidently. This is a valuable read for anyone looking to learn more and make informed decisions.
ReplyDeleteEnrgtech
Pneumatic Suction Cup