
I'd like to briefly touch on the stereo swap before moving on. The stereo that comes with the Honda is no great shakes; the laser struggles to cope with scratched CD-Rs, and forget erasable CD-RWs or any kind of marathon road-trip MP3 disc. Its ergonomics are consistent with the rest of the Civic - that is to say, humblingly counter intuitive and designed to enlighten rather than merely function.
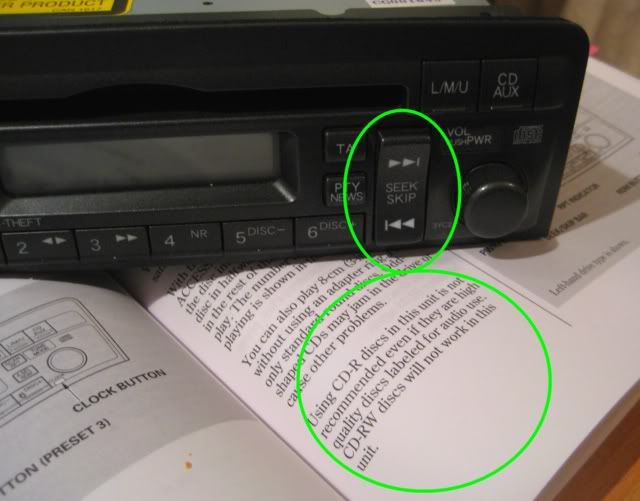 |
| The standard Gen 7 Civic stereo. Toggle the circled vertical rocker switch up to go right, skipping to the next song. "If we are facing in the right direction, all we have to do is keep on walking". |
I mostly followed the excellent guide at hondacivicforum.co.uk to swap the stereo, though without using a metal tool in case I marked the trim, and with the addition of one of those kits with a bezel surround + pre-wired adaptor looms from eBay. The bezel surround was a poor fit and required a lot of sanding down to fit flush with the dashboard centre console. It took some time, but looks pretty good now.
Anyway, I digress. Off we go silencing the squeaking, creaking centre console around the gearshift. This isn't a lengthy process, but was a bit messy - I'm fairly sure the lack of definition in the photographs below was due to my getting grease on the lens!
The bottom half of the centre console is held in place along its outer edges, by 9 plastic catches reinforced with steel strips (x-rayed in green below)
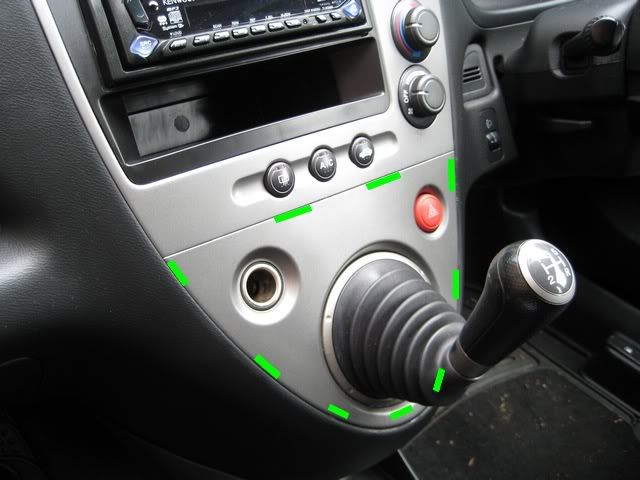
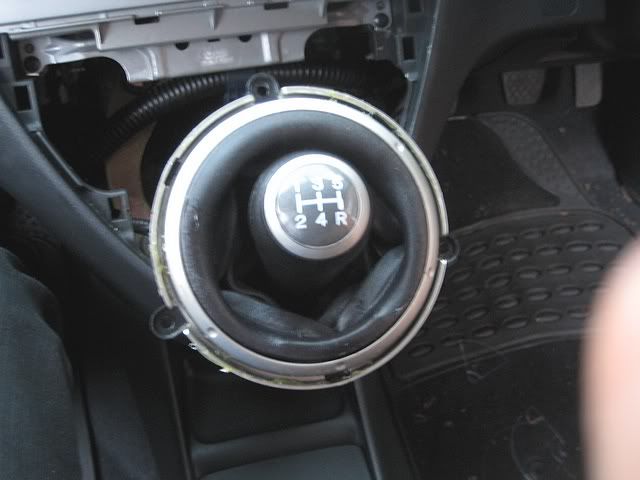
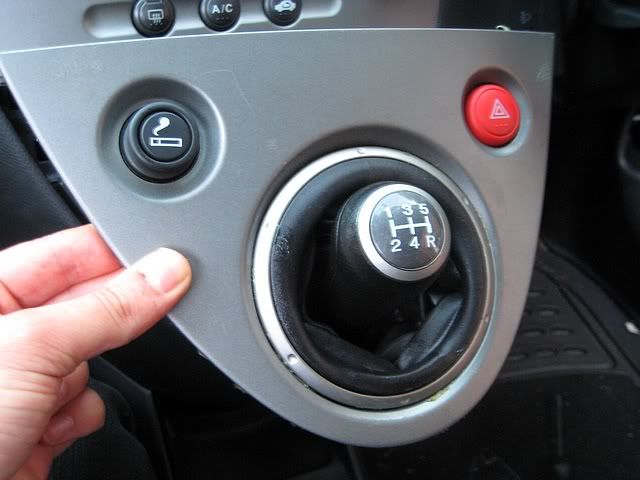
As there is no panel gap to speak of, rather than pry along the edges of the panel, I took out the cigarette lighter and hooked a gloved finger inside, pulling straight out (the socket is not live while the keys are out of the ignition). This released the large top left hand catch; from then on, the panel comes away from the dashboard quite easily.
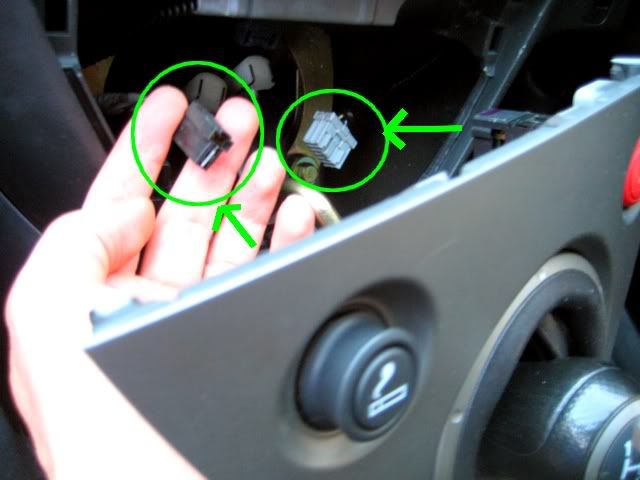
Unplugging the two electrical connectors - cigarette lighter and hazard light switch - allows the best access to the gearshift surround. They're completely different, there's no possibility of slotting them in the wrong way round on refitting.
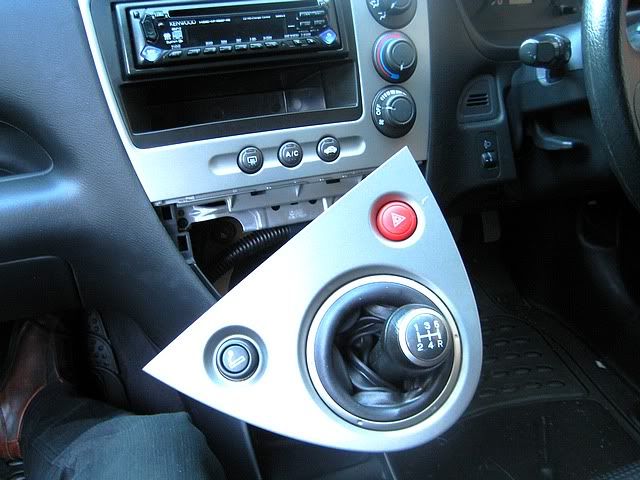
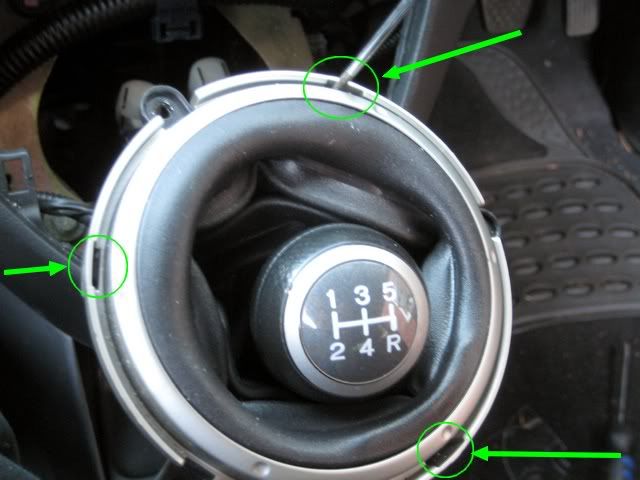
To free the plastic gearshift ring - the main source of my cabin squeaks - I removed the 3 screws highlighted in green below. After this step, the lower centre console bezel can be removed. You can just make out some anti-squeal brake grease I smeared on the plastic edge catches too.
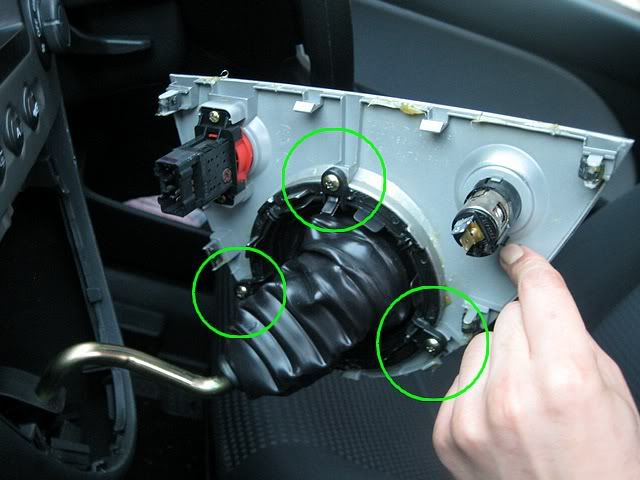
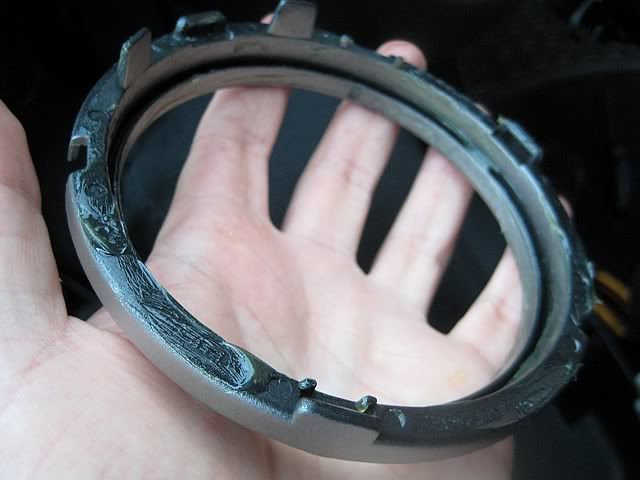
Separating the plastic gearshift ring from it's hidden counterpart, with the aid of a screwdriver (there are three rubbery catches in the areas highlighted):
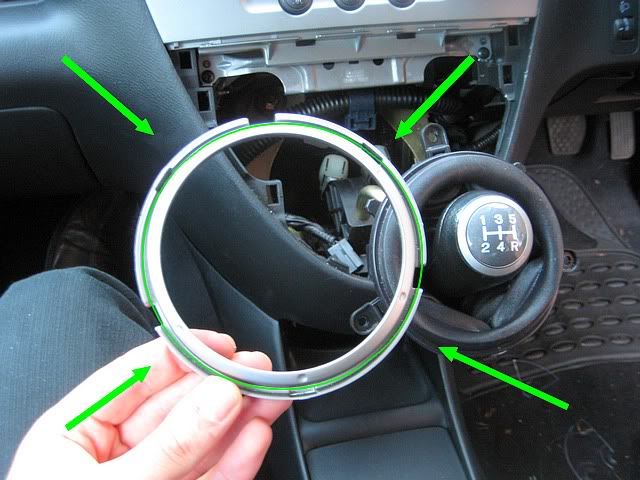
Okay, have a look at the photo below. The squeaks and creaks are caused by the outer gearshift trim ring (pictured) rubbing against the centre console lower panel earlier removed, and the inner gearshift trim ring hidden behind it.
Unfortunately, there is too little clearance to shim the gap with noise silencing felt. Maybe there is some kind of tape you can buy, though it would be an awkward thing to fit in this area. I decided to use Pagid's Cera Tec anti squeal brake grease, reasoning that if it can keep the brakes quiet, it can shut up this noisy panel.
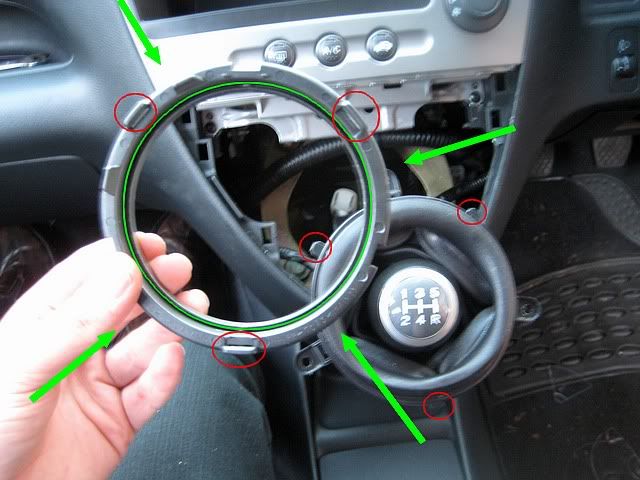
To silence squeaks from between the outer trim ring and the panel, I greased the circular cavity highlighted in green:
Similarly, to silence squeaks from between the outer trim ring and the inner retaining ring, I greased the circular cavity on its dexter side, highlighted in green below. As an aide memoir for reassembly, I've circled the inner trim ring slots and corresponding tabs in red, though there isn't really much scope to go wrong, they only fit together one way.
Perhaps overkill, I put a smear of grease on the inner retaining ring too:
To reassemble, pop the outer trim ring back onto the rubber gearstick gaiter:
Then the centre console lower panel goes over the outer trim ring:
The two are held in place by the inner retaining ring, after pushing the tabs back into their slots and replacing the 3 screws.
Hook the cigarette lighter and hazard light switch electrical connectors back up, and press the panel back into the dashboard (cunning recycling of photographs here)!
Job done. Enjoy the silence!

Thanks for reading,
Flounder